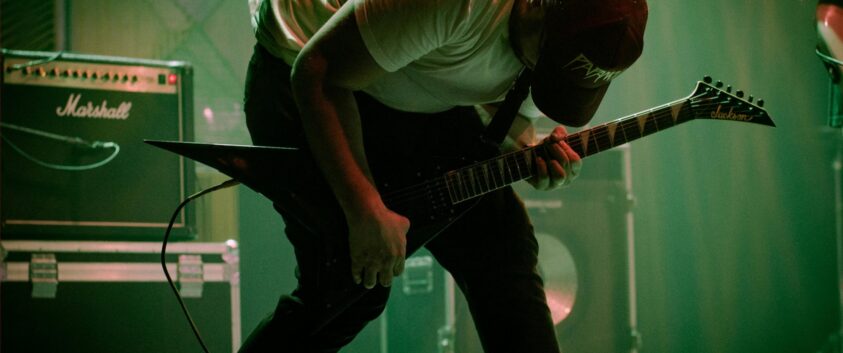
Summer is here at Guitar Pro! Get everything you need to make progress this summer: practice with Guitar Pro, explore thousands of tabs on mySongBook, and shape your sound with TONEX amp and pedal simulations.
Don’t miss out on this special offer: save 25% on Guitar Pro and 50% on mySongBook. Offer valid from June 17 through July 5, 2026.
Summer is the perfect season to grab your guitar. Whether you’re jamming with friends or practicing on your own, learn, play, compose, and enjoy the sunshine with your favorite instrument.
But that’s not all! Purchase a Guitar Pro 8 license or subscribe to mySongBook and get a free collection of amp and pedal simulations for TONEX by IK Multimedia.
We’re also offering 10 free tabs to enjoy on the beach this summer, find them below.
Guitar Pro: The Ultimate Tool to Improve Your Skills and Boost Your Playing
Trusted by millions of musicians around the world, Guitar Pro has been a leading music learning and practice tool for over 25 years.
Discover some of Guitar Pro 8‘s powerful features:
Play Along with the Audio Track
Refine Your Tone with the Pedalboard
Create Your Own Scale Diagrams
Customize Your Scores with the Stylesheet
Practice at Your Own Pace with the Speed Trainer
Transpose Your Favorite Songs with one click
Edit Your Tabs Faster with the Command Palette
Discover a powerful set of features designed to help you improve your playing, streamline your practice sessions, and create and share your own tabs.
Play 10 song extracts that are perfect for your summer sessions, complete with free Guitar Pro files to download. You can also find the full versions of these songs on mySongBook, Guitar Pro‘s official tab library.
Enjoy thousands of tabs transcribed by professional musicians and improve your skills by playing your favorite songs. You’ll find both full scores, featuring every instrument from the original recording, and simplified full scores, including only the guitars, bass, and drums in a more compact and easy-to-read layout.
You can also challenge yourself with specially arranged versions of popular songs for guitar and vocals, solo fingerstyle guitar, or guitar duets, as well as simplified arrangements designed for beginners.
Sound like legendary guitarists with the TONEX ODS Legends collection
With over 30 years of expertise in virtual instruments, amp simulations, and guitar effects, IK Multimedia is giving you the TONEX Collection – ODS Legends sound pack (valued at €119.99) for free with any purchase of a Guitar Pro 8 license or a mySongBook subscription.
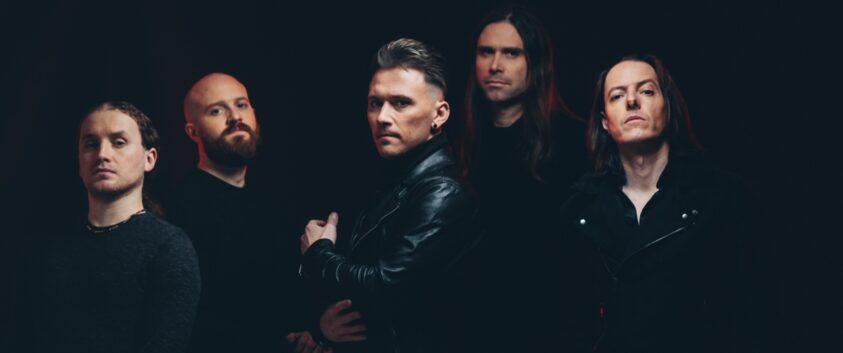
Guitare en Scène 2026 will take place fromJuly 14 to 18 and will feature an impressive lineup including Ben Harper, Gregory Porter, Pixies, Kool & The Gang, Jennifer Batten, and John Butler, to name just a few.
In addition to the concerts taking place throughout the day, festivalgoers can attend masterclasses from July 14 to 17, running daily from 2:00 PM to 4:00 PM. Arobas Music is delighted to be sponsoring the Guitare en Scène 2026 masterclass series.
Please note that masterclass tickets do not grant access to the festival grounds,andfestival tickets do not include access to the masterclasses.
These sessions provide a unique opportunity for guitarists of all levels, from passionate amateurs to seasoned professionals, to connect with renowned experts eager to share their knowledge and experience.
Once again, Guitare en Scène has raised the bar by bringing together four guitar giants, each taking the stage over the course of these four afternoons of masterclasses.
Mattias Eklundh will be the one to kick things off on the afternoon of July 14. Best known as the founder of Freak Kitchen, he has spent decades bringing a unique perspective to modern guitar playing. A true pioneer in guitar education, he launched the Freak Guitar Camp in 1999, an intensive six-day training experience held annually in Sweden that attracts dozens of guitarists from around the world.
A true guitar encyclopedia, Mattias is a wealth of knowledge and inspiration. This is one masterclass you won’t want to miss!
A composer for the BBC, guitarist for the musical Thriller – Live, and more recently a touring musician with Steven Wilson, Alex Hutchings boasts an impressive résumé that most guitarists can only dream of.
A highly respected educator and improvisation specialist, Alex is known for his distinctive blend of jazz, rock, and blues. His masterclass is sure to delight fans of sweeping, diminished scales, and modern guitar techniques.
Influenced by rock, metal, and traditional Celtic music, Pat O’May is a French guitarist and singer who began his career with the bands Marienthal and Road 66. His distinctive musical style later led him to take part in several of Alan Simon’s rock operas, including Excalibur and Anne de Bretagne.
Join Pat O’May to explore his unique musical identity and gain insight into his approach to composition, as well as the way he seamlessly blends different musical styles into his work.
With five Grammy Award nominations, around fifteen solo albums to his name, and collaborations with artists such as Miles Davis, Joni Mitchell, and George Harrison, Robben Ford has built a career that speaks for itself. He was also named one of the 100 Greatest Guitarists of the 20th Century, an accolade few can claim.
Renowned for his distinctive blend of blues, jazz, and rock, Robben Ford is a true master of his craft and one of the most influential guitarists of his generation. Drawing on decades of experience, he will share invaluable insights to help you refine your tone, develop your phrasing, and take your playing to the next level.
Guitare en Scène has been held annually since 2007 in Saint-Julien-en-Genevois, France, just outside Geneva. Each year, the festival welcomes some of the biggest names in guitar and bass, including Joe Satriani, Steve Vai, Steve Lukather, Marcus Miller, Sting, Brian May, Mark Knopfler, Carlos Santana, and many more.
Founded in 2007 by a group of friends determined to bring some of the world’s greatest musicians to their hometown, Guitare en Scène has grown into a family-friendly festival with an intimate atmosphere, welcoming around 5,000 attendees each evening. At its heart is a vibrant community of passionate musicians from all walks of life.
To celebrate the occasion, play and download fourGuitar Profiles featuring artists from this year’s lineup, all available on mySongBook, the official Guitar Pro sheet music library.
As you’ve probably gathered by now, Guitare en Scène 2026 is shaping up to be one of the must-attend events of the summer for guitar enthusiasts. Enjoy outstanding live performances and unique opportunities to meet and learn from some of the world’s greatest guitarists.
Subscribe to the Guitar Pro newsletter so you don’t miss any upcoming articles.
Angine de Poitrine is coming to mySongBook! Let’s explore five extracts from the album Vol. II, all now available in full versions onmySongBook. Download the free Guitar Pro files and try Guitar Pro free for 7 days by downloading the demo here. Change the key, slow down the tempo, and play at your own pace with the Speed Trainer in Guitar Pro.
Find your favorite songs directly in Guitar Pro with mySongBook, the sheet music library featuring thousands of essential guitar tracks. Improve your skills by playing tabs from legendary bands such as Metallica, AC/DC, Nirvana, Van Halen, Lenny Kravitz, Foo Fighters, and many more.
Get one year of access to mySongBook for just €40! Plus, when you purchase a Guitar Pro 8 license, enjoy 50% off your subscription.
Angine de Poitrine is made up of two musicians: Klek on drums and Khn on guitar and bass. The Quebec duo relies on a very specific set of tools to compose their music, so let’s take a closer look at the concepts and gear Khn uses.
The Ingredients Behind Khn’s Sound
Microtonality
Microtonality is a concept widely used in Eastern music traditions, based on playing notes outside the 12-tone equal temperament system commonly used in Western music.
C – C#/Db – D – D#/Eb – E – F – F#/Gb – G – G#/Ab – A – A#/Bb – B – C
Let’s explore the most common form of microtonality used in the West: quarter tones. A key element of Angine de Poitrine’s sound, the concept was notably brought back into the spotlight by King Gizzard & the Lizard Wizard with their 2017 album Flying Microtonal Banana.
In practical terms, a whole tone is divided into two semitones, and a semitone can itself be divided into two quarter tones. These quarter tones are what our ears are generally not used to hearing, at least not in this form. In fact, many guitarists already play them without even realizing it, through quarter-tone bends marked “¼”, which is also how quarter tones are notated in Guitar Pro.
The Double-Neck Guitar
Designed by Canadian luthier Raphaël Le Breton, Khn’s guitar/bass is a double-neck instrument, with theguitar on top and the bass below. The guitar features 36 frets, with an additional fret inserted between each standard fret position to allow quarter-tone playing upto the 15th conventional fret. The same applies to the 32-fret bass, which remains microtonal up to the 12th conventional fret.
Paradoxically, the pickup configurations are fairly standard: three Fender Stratocaster-style single-coil pickups for the guitar, and a Fender Precision-style split-coil pickup for the bass.
The Pedalboard
Khn’s pedalboard is divided into two sections. The first includes a Boss RC-600 looper, a Boss FS-7 Dual Footswitch A/B box, a Radial BigShot A/B/Y box, a Boss DD-8 delay, a Mad Professor Supreme overdrive, a ProCo RAT 2 distortion, an MXR Bass Octave Deluxe octaver, a Fender Engager boost, a Boss TU-3 tuner, and a Boss FV-50 volume pedal.
The second section consists of a Warm Audio RingerBringer ring modulator and four M-Audio EX-P expression pedals, most likely used to control the pedal’s parameters.
The Looper
You may have noticed that the looper takes up a lot of space on the first section of Khn’s pedalboard, and that’s because it also plays a major role in Angine de Poitrine’s music. It’s an essential tool for layering two guitar parts, as well as recording and looping bass lines.
The Ring Modulator
As its name suggests, a ring modulator is a modulation effect pedal that processes the guitar and/or bass signal through oscillators, generating frequencies that can be dissonant and often evoke sci-fi sounds. Combined with Khn’s microtonal playing, it forms the very essence of Angine de Poitrine’s sound.
The Mystery Pedal from Infect FX
We still know very little about this pedal. What we do know is that it was handmade in Quebec by Francis Malo of Infect FX, but no one really knows what kind of sound it produces. Some rumors suggest it could be a gain pedal with experimental tones, somewhere between an overdrive and a ring modulator, but no official information has been released so far.
Amplification
As for the amplification setup, the foundation is fairly straightforward: first, a Roland Jazz Chorus for the guitar. Known for its clean tone and built-in chorus, it pairs perfectly with the various effects on Khn’s pedalboard. For the bass sound, Khn uses a Hartke HA2500 head paired with an Acoustic 4×10 cabinet. In other words, an ultra-transparent rig that brings out the distortion and modulation effects beautifully.
We can assume that these two amps are switched via the Boss FS-7 Dual Footswitch A/B box located at the top left of the first pedalboard.
5 Extracts from Vol. II
You now know almost all the secrets behind Angine de Poitrine’s sound… almost, because your fingers remain the ultimate ingredient. So, I invite you to work through five extracts from the album Vol. II, which will help you improve your playing and get familiar with microtonal techniques.
As a reminder, quarter tones are indicated in Guitar Pro with “¼” pre-bends, making it possible to play the songs without a microtonal guitar, an instrument that is still relatively uncommon.
This section from Fabienk is taken from the famous Live on KEXP performance, which skyrocketed Angine de Poitrine’s popularity after reaching 14 million views on YouTube. The song is written in 7/8, so I recommend practicing with a metronome to get comfortable with this time signature, which can take some getting used to.
The real challenge lies in these staccato notes, which require precise and perfectly controlled bends. This is followed by a fairly fast phrase that reappears in the fourth and eighth bars, and is best practiced very slowly in order to play it cleanly and fully grasp its subtleties.
This song is written in 5/8: a time signature that, much like Fabienk, can be tricky to get comfortable with. It’s also worth noting the speed of both the song and this riff, which is made up entirely of sixteenth notes and thirty-second notes. The key here is consistency, as this fairly repetitive riff can be difficult to play in a loop without a proper warm-up.
The 12/8 time signature already feels a bit more familiar to our ears. As with many Angine de Poitrine tracks, the biggest challenge is maintaining consistency throughout the repetition. This repetitive aspect, combined with the quarter tones, which in 99% of cases you’ll have to play using bends, can feel quite disorienting at first. Especially since Sarniezz introduces another element into the mix: slides. So, just like with the previous two songs, it’s once again essential to practice slowly with a metronome at first.
Here’s a concrete example of how the looper is used: Khn records the Guitar I riffinto the looper, which allows him to play the E minor chordon the offbeats with Guitar II. This layering technique made possible by the looper enables Angine de Poitrine to write and sound like a band made up of four or five musicians.
In my opinion, this last track is more approachable for less experienced guitarists looking to dive into the world of Angine de Poitrine. The bendsare easier to incorporate into the riff, and the pace is slightly slower than in the previous songs (except for Mata Zyklek), despite the 7/8 timesignature, which is not always easy to handle.
The main challenge may be hitting the open G note on the fourth string without accidentally touching the other strings along the way. As always, it’s best to practice this very slowly at first.
Whether you’re a beginner or already an experienced metal guitarist, this selection is made for you. Improve and elevate your playing with some of the greatest metal bands, from Metallica to Korn, including Megadeth and System of a Down.
I’ve selected 10 essential metal song extracts for you, ranging from the most accessible to the most technical, all available on mySongBook, the official Guitar Pro sheet music library.
Breaking the Law is one of the classic tracks that helped shape 1970s heavy metal. This world-famous riff is fairly simple and accessible for beginner guitarists. It sticks to quarter and eighth note rhythms, played at a relatively moderate tempo.
There’s no need to introduce it, just about every guitarist has tackled this track in their early days of playing. Enter Sandman is not only one of Metallica’s most popular songs, but also one of the most accessible for beginner guitarists.
There’s no particular difficulty here: just make sure to let the low E ring out until the first beat of the next bar. For the fingering, I recommend placing your pinky on the 7th fret. This will give you the proper articulation to play the piece as effectively as possible.
The second guitar on What I’ve Done, one of Linkin Park’s many hits, complements the lead guitar with barre power chords. The Drop D tuning makes it possible, among other things, to play these chords using just one finger.
The fifth is doubled an octave higher over the first three measures of the progression to give the chord more weight. To play in Drop D, simply lower the low E string by a whole step, giving you a D–A–D–G–B–E tuning.
Here’s a slightly more challenging riff that you’ll need to practice slowly to fully grasp its mechanics. This Ghost track is in Drop D, designed to make fingering easier. The part is rhythmically consistent throughout, so you can loop it in Guitar Pro to master all its nuances.
The advantage when playing Aerials is that the riff’s mechanics stay the same throughout the entire song. It’s tuned C–G–C–F–A–D, with the bass notes changing while the G and C strings are played open. Let all the notes ring out to create that droning effect, which gives this iconic System of a Down track its distinctive atmosphere.
As in nearly all Iron Maiden songs, one guitar harmonizes the lead guitar in thirds. What’s useful for you is the ability to switch parts within the song: for example, you can play the first four measures on the lead guitar, then take over the harmonized part for the next four measures.
That’s why I’ve included an excerpt showing both parts played simultaneously. Pay attention to the sextuplets played with hammer-ons and pull-offs, they’re more approachable than they seem, but you should still practice them slowly at first.
With the low B string tuned down to Drop A, this riff is packed with fairly fast chromatic runs, and is slightly altered and then transposed at the end of the extract I’m offering. My advice, somewhat old-school, but proven effective, is to practice this riff with a clean tone.
Adding distortion or effects right away would only mask any flaws in your playing. That’s why I recommend, at least at first, practicing with a clean tone, even if it’s less “glamorous.” You’ll thank me later.
Now things start to get a bit more challenging. This time, all the strings are tuned down a whole step from standard tuning, giving us D–G–C–F–A–D. Don’t be fooled by the “simplistic” feel of the main riff, it still requires a fair amount of precision and cleanliness, especially with the slides and ghost notes that lock in with the kick drum.
I’m deliberately leaving you with the last bar, it will require a bit of patience, especially if you’re not familiar with Pantera’s style.
You can clearly recognize Dave Mustaine’s style here, the former Metallica guitarist, replaced by Kirk Hammett, who later went on to form his own band, Megadeth. The riff is built around a B minor scale, incorporating the blue note (a diminished fifth).
As with 5 Minutes Alone by Pantera, the last bar proves a bit tricky to master. It features plenty of hammer-ons and pull-offs, along with slides and palm-muted notes.
The first triplet-based piece, and the final track in this selection, it also happens to be one of Lamb of God’s most well-known songs. It’s played in Drop D, and I can assure you, it will definitely make you break a sweat.
In the first section, you’ll need impeccable articulation to play it at that speed. In the second, the challenge lies more in the rhythm, combined with those pinch harmonics, an effect produced with the thumb of the picking hand.
We’re delighted to be speaking with Levi Clay, a professional guitarist and respected educator, he’s also been a longtime Guitar Pro user. In this interview, he opens the door to his world, sharing his journey, influences, and insights to help you improve and take your playing to the next level.
How did you discover the guitar, and what made you start playing?
“I was around music when I was a kid. My grandfather was a semi professional guitarist in his youth and my grandmother met him when she was put in a duo with him as she played the piano. By the time I came along they’d both long since stopped playing, but his old acoustic guitar was always around and he kept his love for Django.
Sadly I didn’t take much interest in music until I was about 13. It’s a massive shift from where I am now, but I was really into Blink 182 and The Offspring. The thing that got me real serious was my girlfriend’s Dad (who also played) gave me an issue of Total Guitar magazine where Noodles from The Offspring, Joe Satriani and Mick Thomson interviewed each other. That was the moment I went from playing to be cool to playing because I had to.”
I know you also play piano, which instrument did you start with, and do you have a preference between the two?
“Oh, guitar all the way! As I just mentioned, I started playing guitar at 13, and I didn’t take up the piano until I was 32. Obviously I’ll always be a guitar player at my core, it’s all I’ve known for most of my life. Having said that, I gig more on the piano now and most of my practice time is devoted to the piano because it’s just given me a deeper access to music and ear training.”
Did you take music lessons, or are you self-taught?
“I’ve never liked the “self-taught” badge. I grew up really poor, so I didn’t have a teacher in the traditional sense. I would be given old magazines (we didn’t have the internet!) and I would learn everything in them. Then when I started earning money from a paper round, I subscribed to Guitar Techniques magazine. I was self guided, sure, but I would never call myself self-taught.
Every columnist I read was my teacher. Shaun Baxter, Guthrie Govan, John Wheatcroft, Jamie Humphries etc. I experienced my first 1:1 lessons when I went to college (Colchester) where as part of the music program you got a teacher… but the only teacher they had was a classical teacher, Adrian Johnson. So during that time I did classical guitar. I enjoyed it, but I was a rock guy who couldn’t give it the discipline it deserved to go all the way.
From there I went to London to the Guitar Institute where I had a lot of 1:1 time, both with guys at the school who taught my course, and privately with the great Martin Goulding. But again, to not pay tribute to the great guys who influenced me during that time like Max Milligan and Iain Scott would be dishonest.
On the piano/organ I’ve taken lessons with some amazing guys like Tony Monaco (B3 legend!) and Noah Kellman (amazing LA jazz dude!)
And that’s before mentioning the HUGE library of books I have from countless incredible authors who have all helped shape me. Mick Goodrick. William Leavitt. Randy Vincent. I could talk about teachers all day!”
Play Leaving London by Levi Clay!
What are your main influences?
“Those that know me know I play a lot of styles of music. You might know me as a rock/metal guy, ablues guy, acountry guy, a jazz guy, or maybe you’ve seen my soul band in Glasgow. I play so many styles of music, not because I have to, but because there’s a genuine love and passion for so many styles of music. I will say this though, I mentioned why I started but I think (like many guitarists) I lost sight of that in the pursuit of knowledge and technique. In the last 5 or so years I fell back in love with songs.
Now I listen to a lot of great music and I can’t even tell you who plays guitar in the bands because it just doesn’t matter to me. So, dude in Lake Street Dive (I know I could have Googled but it would undermine the point!) hats off to you, I’ve listened to you play several times a week for a long time. You guys are awesome.
Oh… and musical theatre. Big musical theatre guy.”
You’re deeply involved in guitar education, having written 21 books, and taught millions of guitarists via Youtube, what do you enjoy most about teaching music?
“Anyone who has taken lessons with me, or follows my teaching will know that despite it being cliche, old sayings are often true. It’s amazing to get messages from people, or sit down with someone and help them get to the next level in their playing. Help them overcome the things they’ve not been able to with someone else. I’ve been so lucky in my life/career in that I didn’t start with much, but I came across so many people who were so generous and helped pull me out of what could have been a very dark life.
It wasn’t money that gave me a career, it was education. If I can help people become better and have better lives, is there any better feeling? It keeps me going! Over the last decade, my work had reached millions of guitarists through books, Youtube, and structured online teaching, but the real magic is getting to put faces to some of those success stories. Getting to know you guys!”
Where do you see the biggest gap between beginner/intermediate players and advanced musicians?
“Oh that’s easy! So on my site (GuidedPracticeRoutines) I work with hundreds of players and there’s this very obvious divide in players and it’s about helping them overcome that. Beginner/intermediate players don’t learn to play the guitar, they’re remembering how to play the guitar. It’s not really an understanding, it’s a memorization task.
Can they remember all the tab and move their hands in the right places to play it? Many people never overcome that, and that’s fine. But for me, the thing that pushes you into that next level is when you’re learning music and how it works. I can teach you an idea like closed voiced triads, we can practice them together, we can apply it to an etude etc… but if you panic when I say “ok, now you pick a song and apply the concept to it” then you’ve not really learned the concept yet, you’ve just remembered the exercise.”
Play Too Little Too Late by Levi Clay!
How long have you been using Guitar Pro, and which version did you start with?
“I got Guitar Pro 5.2 when I was in college. In school we were doing a lot of Bach chorals, counterpoint, and film scores… so it was Sibelius, but the guitar isn’t an orchestral instrument, there’s so much more we do in terms of techniques that I don’t find engraving software caters to guitar in the way Guitar Pro does. And it’s just got better and better as each version has been released.”
You’re widely regarded as one of the leading voices in guitar transcription. How do you approach transcribing a piece? What separates a “good” transcription from a truly great one?
“My background in classical and formal education might have given it away, butI’m a reader. While I create tab online for people, that’s about accessibility (because music isn’t to be gate-kept by those who can read), but when I’m actually creating work, it’s a simple process. Listen.Sing. Write. We can all do the first one. Some of us need work on the second. But the third one is where people struggle. Because I can read, there’s no trial and error when writing out what I heard.
I hear it, I can see it (because reading is seeing it and hearing it right?), andthat’s the separator between a good and great transcription. It’s important to remember that transcriptions are a learning tool, and they should make learning as easy as possible. Notation has conventions. So things like key signature, multi-voice writing, enharmonic, and correct use of ties to make reading easy all matter to me. You can learn to transcribe without knowing all that, sure… but when someone who understands the conventions sees it, i loks lyke ur riting Likethis, ifyo u C wat i meen?””
What’s your favorite feature in Guitar Pro?
“Oh the audio import feature for SURE. I don’t use it as a way to listen to the file. I load the audio in when the job is done. But being able to sync the file to the audio and deal with things like tempo accelerating, or free-time pieces is a complete game changer. I don’t know how I would be able to make some of the Youtube videos I make without it!”
Play Good Time Girl by Levi Clay!
Can you share five tips for editing scores like a pro in Guitar Pro?
“Just five??? Man, I’ve taught this software to SO many people I could give you 20! But ok, let’s try five!
So first up, get in Stylesheet and readEVERY little option, know what they are, work out what you want and create a default template. Are you going to be using dynamics? If you’re turning off notation, disable “Display circle around half and whole notes in tablature“, disable “Indicate where the string is touched for artificial harmonics in tablature“, disable “Hide useless rests on standard notation” etc. Let the program do some of the work for you with stylesheet presets!
Learn about beaming to make your transcription easier to read for readers, and look like the real deal. (It’s the Editing palette)
Sextuplets are ok, stop having bars and bars of 16th note triplets!!!
Design mode is your friend. Organize your measure per line so the music isn’t too cramped (again, we want it easy to read!) but make sure new section start on new lines if you can.
You want to use as little ink as possible. Give the person as much as they need, and no more. If you’re using notation, put a key signature in, it will eliminate tons of accidentals in the score which will help space things much better.
And a bonus one… learn to notate bends so they’re both clean, but accurate to the intention!”
Time to play!
We hope you found this interview with Levi Clay both insightful and inspiring. Don’t hesitate to post your questions in the comments and let us know your first impressions!
The progressive metal band TesseracT is back! Following the release of their 2023 album War Of Being, the British group is revisiting it in a fully instrumental version, yes, you read that right. For context, the album tells the story of two characters, Ex and El, whose ship crashes on the planet The Strangeland.
For this special release, War Of Being will be fully available in mySongBook, so the first nine titles are available now, complete with vocals. Perfect for all Daniel Tompkins fans. Immerse yourself in the world of the album with these five extracts for guitar, bass, and drums, and enjoy the included Guitar Pro files. Download the demo and join Ex and El aboard their ship, heading straight to The Strangeland.
Explore the thousands of scores available on mySongBook, the official Guitar Pro catalog. Play iconic tracks from some of the biggest metal bands, including Metallica, System of a Down, Slayer, Iron Maiden, Korn, Gojira, and many more.
This first snare roll is played as ghost notes, with the China cymbalfollowing the guitar’s theme, which itself is played palm-muted. After the setup in measure 9, the bass comes in to play the theme in unison with the other guitars. Pay close attention to the accuracy of the bends, and be careful when the three measures in 5/4 – 5/4 – 4/4 arrive, as they lead into the first verse.
Note: The track is played on a 7-string guitar, tuned A–E–A–D–E–A–D. The bass is tuned A–E–A–D and played with a pick.
For Echoes, I’ve chosen to highlight the second verse, which I find particularly interesting. One of the guitars plays a funky pattern, which I think is very original in the context of the track. This is all accompanied by the drums, with the hi-hat played on every beat while the snare juggles various offbeat patterns. The bass is played with palm-muted eighth notes. Watch out for the 6/4 measure that leads into the chorus.
Note: As with Natural Disaster, the guitars are tuned A–E–A–D–E–A–D. The bass is tuned A–E–A–D and played with a pick.
In the first verse of The Grey, you’ll encounter a rather complex pattern that you’ll need to practice slowly to master and play cleanly. The guitar and bass play this pattern in unison, starting on the first offbeat, creating a constantsense of syncopation. This section is played using left-hand tapping and pull-offs. Technical and rhythmic precision are essential to execute this part accurately.
Isolate the tracks in Guitar Pro to practice the more complex parts with greater precision.
The drums accentuate the guitar and bass on the kick and snare. The break in measures 36 and 37 will likely give you a real challenge.
Note: The track is played on a 7-string guitar, tuned Bb-F-Bb-Eb-F-Bb-Eb. The bass is tuned Bb-F-Bb-Eb and played with a pick.
The bass part in the first verse of Legion is quite rhythmically complex. Even though it may seem simple since the groove is played only on Ab, I strongly recommend paying close attention to the subtleties in the choice of eighth notes. As you might expect, the drums accompany the bass with the kick, while the guitar plays an ambient, soaring pattern in the upper register.
Note : The track is played on a 7-string guitar, tuned Ab-E-A-D-E-A-D. The bass is tuned Ab-E-A-D and played with a pick.
During the third verse of Tender, Guitar IV sustains a continuous harmonic bed by playing an ostinato built around the note E, while the bass movement shifts underneath. This allows the other guitars to perform harmonized arpeggios and reinforces the track’s hypnotic atmosphere. The bass closely follows the kick drum pattern, making rhythmic precision absolutely essential.
Note: As with Echoes, the guitars are tuned A–E–A–D–E–A–D. The bass is tuned A–E–A–D.
Special mention for drummers: get your double bass pedal ready, you’re likely going to need it. The hi-hat plays on every beat, except during the eighth-note triplet patterns, which are played on the bass drum and accented with a crash on each beat. The guitars and bass support this heavy rhythm with surgical precision on the eighth-note triplets.
Note: As with Legion, the guitars are tuned Ab–E–A–D–E–A–D. The bass is tuned Ab–E–A–D and played with a pick.
What makes this section of Sirens particularly interesting is that the main chorus is conceived in 4/4, while the reprise shifts into 6/8. Although the feel remains the same for both the guitars and the bass, the drums undergo a radical change in interpretation. The pattern takes on a completely different direction, with the hi-hat articulated across all six beats in the reprise, as opposed to four in the original chorus.
The guitars play augmented ninth and tenth intervals (minor and major thirds voiced an octave apart), while the bass performs struck octaves enhanced by a fade-in effect created with a volume pedal during the chorus.
Note: As with Tender, the guitars are tuned A–E–A–D–E–A–D. The bass is tuned A–E–A–D.
The pattern in Burden recalls the first verse of The Grey. The guitars and bass perform in unison, combining slapping, popping, and left-hand tapping techniques. It is important to practice this section very slowly and become comfortable with these unconventional techniques, particularly on guitar. The drum part emphasizes the accents and reinforces the track’s sense of weight and solidity.
Note: As with Sirens, the guitars are tuned A–E–A–D–E–A–D. The bass is tuned A–E–A–D.
Once again, the focus here is primarily rhythmic. The bass and drums are what keep everything grounded, constantly shifting between accents on the downbeat, the third offbeat, the second beat, the fourth offbeat, and so on. The final 2/4 bar creates a highly effective push at the end of the cycle.
The guitar part is built around an ostinato alternating between palm-muted notes, left-hand vibrato, bends, and ghost notes. This piece is an excellent exercise for developing rhythmic precision and mastering expressive playing techniques at a higher level.
Note: As with Burden, the guitars are tuned A–E–A–D–E–A–D. The bass is tuned A–E–A–D.
Hey guys, I had the chance to meet and interview John Butler backstage! The experience was incredible as John is one of my favourite artists and guitarists.
In this video, you’ll learn how to play “So Sorry” with John himself, one of his new songs released in 2025 from his album called PRISM. John walks us through the essential techniques behind the track and explains the tuning and right-hand approach that give the song its character.
The song is played in an open B tuning, which gives the guitar a rich and resonant sound.
The tuning is:
B – F# – B – F# – B – D#
This open chord tuning allows John Butler to create powerful octave textures across the fretboard. Open tunings are a big part of Butler’s style and help create the amazing sound heard in many of his songs.
Special thanks to John Butler and his team, Ludo Egraz from GuitareXtreme, Charlotte Delangle for helping me shoot the interview, Thomas Grundrich for editing the video and Christophe Maerten for editing the Guitar Pro tablature.
Tell us what your favourite John Butler song is in the comments.