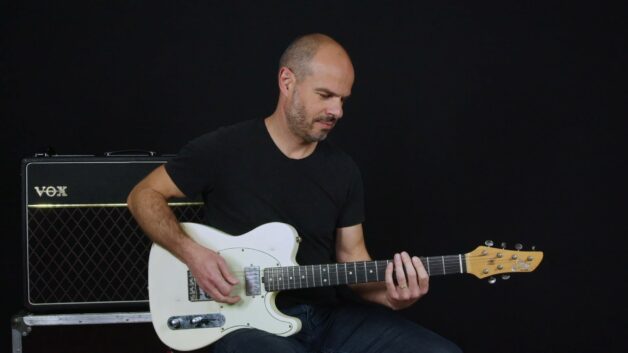
strumming by dan holton

Mastering Strumming Exercises on Guitar: A Beginner’s Guide

Key Takeaways:

  • Keeping your strumming hand in constant motion is essential for smooth rhythm.
  • Understanding eighth-note and sixteenth-note strumming will improve your timing and groove.
  • Practicing ghost notes helps develop a natural feel and fluidity in strumming patterns.
  • A universal strumming pattern (down, down, up, up, down, up) can be applied to many songs.

Why Strumming Matters More Than You Think

Strumming is the backbone of rhythm guitar, yet it’s often overlooked by beginners eager to jump into playing full songs. The reality? If your strumming isn’t solid, even the simplest chords won’t sound right. A well-developed strumming technique ensures your playing feels fluid and natural. Something that separates beginners from more experienced players.

Many new guitarists struggle with keeping time. The key is to maintain constant hand movement, even when not hitting the strings. It’s the same principle drummers follow: the motion never stops, ensuring smooth transitions and a steady beat. If you’ve ever listened to classic tracks by artists like Bob Dylan or Johnny Cash, you’ll notice their right-hand movement never hesitates, no matter the tempo.

Learning the Universal Strumming Pattern

If you only learn one strumming pattern at the start, make it this one: down, down, up, up, down, up, for the strums that hit the strings, you need to insert the missing (ghost) strokes in the air to maintain a consistent motion.. It’s an incredibly versatile rhythm that works across genres, from folk and pop to rock and country. Here’s how to get comfortable with it:

  1. Start by holding an E minor chord. It’s a simple shape that lets you focus entirely on your right hand.
  2. Strum down, down, up, up, down, up at a slow, even pace.
  3. Pay attention to your wrist movement. Keep it loose and relaxed.
  4. Gradually increase speed, making sure each stroke lands cleanly.

A common mistake? Stopping hand movement between strums. This disrupts the rhythm, making your playing sound choppy. Even when you’re not hitting the strings, your hand should keep moving as if playing ghost notes. Imagine tapping your foot to the beat. It keeps you anchored, just like your strumming hand.

Mastering Eighth-Note and Sixteenth-Note Strumming

Understanding rhythmic subdivisions is crucial to developing a strong groove. Most beginners start with eighth-note strumming, counted as: “1 and 2 and 3 and 4 and”. This means your strumming hand moves eight times per measure. Many iconic songs, like “Knockin’ On Heaven’s Door” by Bob Dylan, rely on this rhythm.

For a tighter, more energetic feel, we move into sixteenth-note strumming, counted as: “1 e and a 2 e and a 3 e and a 4 e and a”. This allows for faster, more percussive strumming without increasing the song’s tempo. Think of funk or reggae: those genres rely heavily on precise sixteenth-note patterns.

A simple exercise to develop both techniques:

  • Strum eighth notes on an E minor chord, emphasizing the downbeats.
  • Switch to sixteenth notes at the same tempo, keeping your wrist loose.
  • Alternate between the two, listening for the difference in feel and attack.

Common Pitfalls and How to Fix Them

Many beginners hit roadblocks when learning strumming, but the good news is most mistakes are fixable. Here are a few frequent issues and how to correct them:

  • Rushing or dragging the beat: Practice with a metronome to build internal timing.
  • Over-gripping the pick: A tight grip leads to a stiff, unnatural strumming motion. Hold the pick loosely for better control.
  • Ignoring dynamics: Strumming isn’t just about rhythm, it’s about feel. Try accenting certain beats (e.g., the second “down” in our universal pattern) to add musicality.
  • Skipping ghost notes: Even when you’re not striking the strings, your hand should keep moving to maintain the groove.

Taking Your Strumming to the Next Level

The journey to mastering strumming exercises on guitar is about consistency and patience. Experiment with different rhythms, play along with your favorite songs, and record yourself to track progress. Over time, your strumming will become second nature, allowing you to focus more on chord changes, melody, and expression.

Strumming might not be the flashiest aspect of guitar playing, but it’s one of the most important. Get it right, and everything else will fall into place.
advanced extended guitar chords: 9th, 11th and 13th voicings, by dan holton

Advanced Extended Guitar Chords: 9th, 11th and 13th Voicings

Why Learn Extended Chords? (And When to Use Them)

There comes a point in every guitarist’s journey when standard major and minor chords start to feel limiting. Sure, they’re the foundation of almost every song, but if you want richer, more expressive harmonies, you need to step into the world of advanced extended guitar chords. Specifically, 9th, 11th and 13th voicings. These chords are essential in jazz, fusion, and modern rock, offering lush textures that make chord progressions more dynamic and compelling.

The Building Blocks: How 9th, 11th and 13th Chords Work

Extended chords build upon basic triads by adding additional scale degrees. Think of them as an evolution of major and dominant seventh chords:

  • Add 9th Chords: A triad or a four note chord plus a 9th (the second scale degree raised an octave).
  • Add 11th Chords: A triad or a four note chord with an added 11th, often altered (sharp) for color.
  • Add 13th Chords: The broadest extension, including a 13th (the sixth degree raised an octave) on top of a triad or four note chord.

For example, C major 9 (Cmaj9) consists of C (root), E (major third), G (fifth, often optional), B (major seventh), and D (ninth). A C major 9#11 adds an F# for a slightly tense but beautiful flavor.

Teaching Tip: The Role of the Fifth

A common mistake among beginners is assuming every note in a chord formula is equally important. The fifth is often optional in extended voicings. Since it doesn’t add harmonic tension or resolution, many players omit it to keep voicings less cluttered. This is especially useful when playing in a band setting where the bass player is covering the root and fifth.

Altered Chords: Adding Tension for More Expressive Playing

Not all extended chords are purely about color. Some introduce tension, perfect for resolving into a stable harmony. Two particularly useful ones are:

  • C7 alt (C altered dominant): Typically includes a root, third, a flat or sharp five, and a minor seventh creating a strikingly dissonant sound.
  • C7♭13 (C dominant 7 flat 13): A dominant seventh chord with a flattened 13th (A♭), often used in jazz and blues to lead into another chord.

Take the C7(9,#11,13) voicing. This chord is packed with extensions: root, third, seventh, ninth, sharp 11th, and 13th, which means you must make choices. Guitarists rarely play every note; instead, they emphasize different tones depending on the context. In a jazz comping setting, you might highlight the third, seventh, and one or two extensions, while a solo guitarist might adapt the voicing to fit their arrangement.

Common Pitfalls: Overcomplicating Chord Voicings

A mistake many players make when exploring extended chords is thinking more notes always equal a better sound. The reality? The best voicings balance complexity with playability. In many cases, less is more: dropping certain notes (like the root when playing with a bassist) can create clearer, more open sounds.

Where to Go Next with Extended Chords

Mastering 9th, 11th and 13th voicings will transform your approach to harmony. Whether you’re playing jazz standards, crafting sophisticated rock ballads, or adding flavor to blues progressions, these chords open up new sonic possibilities.

To integrate them effectively:

  • Start by adding a single extension to familiar chords (e.g., replace C major with Cmaj9).
  • Listen to players like Pat Metheny, John Scofield, or Bill Frisell, who use extended harmonies creatively.
  • Experiment with voicings in different positions. Some are easier to play higher up the neck.

With patience and practice, these chords will feel as natural as your open-position basics and they’ll make your playing infinitely more expressive.

four-note guitar chords: sixth, seventh and add9 voicing, by dan holton

Mastering Four-Note Guitar Chords

Key Points to Remember

  • Four-note chords provide a richer and more complex harmonic foundation.
  • Understanding their structure helps improve your ability to compose and improvise.
  • Common four-note chords include sixth, major seventh, minor seventh, and dominant seventh variations.
  • Variations like add9 and half-diminished chords expand your musical palette.

Why Four-Note Guitar Chords Matter

If you’ve been playing guitar for a while, you may have noticed that basic triads can only take you so far. That’s where four-note chords come into play. These chords, adding an extra note to the usual root, third, and fifth, open up new textures and harmonic possibilities. Think of them as the foundation of jazz, blues, and pop harmonies. After all, the smooth sound of a major seventh chord or the tension in a dominant seventh is what gives so many songs their character.

Guitarists from Wes Montgomery to John Mayer have relied on these chords to create signature sounds. But understanding them isn’t just about memorizing shapes. Knowing their construction will help you use them more effectively in your playing.

Breaking Down Essential Four-Note Chords

Let’s go through some of the most useful four-note guitar chords and their structures:

  • C6 (Sixth Chord): This one consists of a major triad (root, third, fifth) plus a sixth. You’ll hear it a lot in jazz and swing music, often replacing a simple major chord to add warmth.
  • C Minor 6: Almost identical to C6, but with a minor third instead of a major third. If you’ve ever played a bossa nova progression, you’ve probably come across this one.
  • C Major 7: A favorite in jazz and pop ballads, this chord builds on a major triad by adding the major seventh, creating a dreamy, unresolved feel.
  • C Minor 7: Swap the major third for a minor third, and lower the seventh by a half step. This chord is everywhere in blues and funk, giving a laid-back groove.
  • C Minor 7 Flat 5 (Half-Diminished Chord): A minor seven chord with a flattened fifth, this one has a more mysterious, unresolved quality and often appears in jazz progressions.
  • C Add9: A bright and open-sounding chord that adds the ninth degree while omitting the seventh. It’s commonly used in acoustic pop and folk music.
  • C Dominant 7: If you play blues, rock, or funk, this chord is essential. It combines a major triad with a flattened seventh, creating the tension that makes dominant chords so powerful.

Common Challenges and How to Overcome Them

Many beginners struggle with finger placement and clarity when learning four-note chords. It’s tempting to press down too hard, but that can lead to unnecessary tension in your hand. Instead, focus on proper finger positioning and minimal pressure. Your fingers should land directly behind the frets for the cleanest sound.

Another frequent mistake is neglecting muting unwanted strings. Unlike power chords, four-note chords often require careful muting techniques to avoid unwanted ringing notes. Try using your index finger to lightly touch adjacent strings that shouldn’t be played.

Teaching Tip: Integrating Four-Note Chords into Your Practice

  • Start by isolating each chord and practicing it in a cycle of fourths (Cmaj7 → Fmaj7 → Bbmaj7, etc.).
  • Use them in real songs: try substituting a Cmaj7 for a C major in any pop ballad.
  • Listen to classic tracks that feature these chords, like The Beatles’ “Something” (major seventh chords) or Stevie Ray Vaughan’s blues progressions (dominant sevenths).
  • If you struggle to remember their structures, visualize them as triads with an extra color tone. It helps internalize their sound and function.

Expanding Your Chord Vocabulary

Mastering four-note guitar chords is more than just memorizing shapes, it’s about understanding how they fit into the bigger picture of harmony and songcraft. Whether you’re drawn to the smooth sophistication of jazz, the soulful depth of blues, or the lush textures of pop, these chords will elevate your playing and songwriting.

Start experimenting with them today, and you’ll soon find yourself hearing music in a whole new way.

guitar triads and dyads major, minor, augmented and power chords by dan holton

Mastering Guitar Triads and Dyads, the Essential Chords for Beginners

Key Takeaways:

  • Triads form the backbone of many musical harmonies.
  • Dyads, or two-note chords, add depth to simple riffs.
  • Major and minor triads are crucial for chord progressions.
  • Augmented and diminished chords introduce tension and movement.
  • Power chords and fourth dyads are indispensable in rock and blues.

Understanding Guitar Triads: A Fundamental Skill for Every Guitarist

Guitar triads are among the first harmonic concepts a player should grasp. These three-note chords define the structure of countless songs, spanning rock, jazz, and classical music. At their core, triads consist of a root, a third, and a fifth. A formula that determines their sound.

A C major triad, for instance, is built from C, E, and G. That bright, resolved tone you recognize in pop and rock anthems? It comes from the major third (E). Now, if you flatten the third (E to E♭), you get a C minor triad, which instantly shifts the mood toward something more somber or reflective. This subtle change is at the heart of why minor chords feel so different from major ones.

Digging Deeper: Augmented and Diminished Chords

Once you get comfortable with major and minor triads, it’s time to explore more nuanced harmonic colors. Augmented and diminished chords are often misunderstood by beginners, but they serve an essential role in musical storytelling.

  • C Augmented (C+): A root, major third, and sharp fifth (C, E, G#). This unusual chord feels tense and unresolved, commonly leading into a more stable harmony.
  • C Diminished: A root, minor third, and flattened fifth (C, E♭, G♭). Its eerie, unstable sound appears frequently in jazz and classical compositions.

While you might not use these chords in every song, they’re crucial for creating movement between progressions. Think of how The Beatles often used diminished chords to add unexpected tension before resolving to something more familiar.

Dyads: When Two Notes Are More Than Enough

While triads form the basis of most chords, dyads strip things down even further. The most famous dyad? The power chord (C5), which consists of just a root and a fifth (C and G). This is the driving force behind rock, punk, and metal. Just listen to AC/DC’s “Back in Black” or Nirvana’s “Smells Like Teen Spirit”.

Another useful dyad is the fourth dyad (C4), built with a root and a perfect fourth (C and F). This simple, open sound can add a fresh feel to your playing, especially in genres like blues or alternative rock.

Learning Tips: How to Practice Guitar Triads and Dyads Effectively

  • Visualize the shapes: Identify triad positions across the fretboard to improve your understanding of chord relationships.
  • Practice with progressions: Try switching between major, minor, and augmented triads to train your ear.
  • Avoid excessive grip tension: Many beginners press too hard when forming new chord shapes, leading to hand fatigue.
  • Listen to real examples: Play along with songs that incorporate these chords, like “Hotel California” for triads or “Smoke on the Water” for dyads.

Start Exploring Guitar Triads and Dyads Today

Mastering guitar triads and dyads will not only improve your fretboard knowledge but also expand your creative potential. Whether you’re jamming on power chords or adding texture with diminished shapes, these tools will make your playing more expressive and versatile.

Start integrating them into your practice routine and see how they transform your sound!

guitar power chords by hubert boulogne

Mastering Guitar Power Chords: The Foundation of Rock

Key Takeaways

  • Power chords are simple yet fundamental to guitar playing, especially in rock and metal.
  • They consist of just two notes: a root note and a perfect fifth, making them neither major nor minor.
  • There are several ways to play power chords, including variations with octaves for added depth.
  • Understanding these chords will improve rhythm playing and help you tackle countless iconic songs.

Why Power Chords Matter

Power chords are the backbone of rock, punk, and metal. From the distorted riffs of The Ramones to the anthemic sound of AC/DC, these two-note chords shape the energy and drive of countless songs. Their simplicity makes them ideal for beginners, but don’t be fooled: mastering them with precision and control takes practice.

Unlike open chords, power chords strip harmony down to its raw essence. Because they lack a third, they adapt easily to both major and minor tonalities, making them incredibly versatile. This is why you’ll hear them in everything from bluesy rock to heavy metal shredding.

How to Play Power Chords – And Avoid Common Pitfalls

At their core, power chords are built from just two notes: the root and the perfect fifth. Here’s how to position your fingers correctly:

  • Place your index finger on the root note.
  • Use your ring finger or pinky to press down the fifth (two frets higher on the next string).

One of the biggest challenges beginners face is muting unwanted strings. Accidentally hitting extra notes can muddy your sound, so use the side of your index finger to lightly mute adjacent strings. This technique is crucial for achieving the clean, punchy tone that makes power chords so effective.

Expanding Your Power Chord Repertoire

Power chords may seem straightforward, but there are six variations worth exploring:

  1. Basic Power Chord: Root + Fifth (the most common shape).
  2. Extended Power Chord: Root + Fifth + Octave (fuller sound, common in metal).
  3. Lower Fifth Variation: Root + Fifth + Lower Octave Fifth (deeper resonance).
  4. Minimalist Variation: Root + Lower Octave Fifth (punchy and percussive).
  5. Layered Power Chord: Root + Fifth + Octave + Lower Octave Fifth (thickest version).
  6. Fifth + Octave Variation: Omits the root for a unique, open sound.

Each version has its own character, so experiment to see which fits your playing style. Nirvana’s ‘Smells Like Teen Spirit’ is a great example of basic power chords in action, while Metallica’s ‘Enter Sandman’ makes use of octaves for a heavier feel.

Practice Tips for Stronger Power Chords

Perfecting power chords isn’t just about knowing the shapes, it’s about control, precision, and consistency. Here are a few tips to refine your technique:

  • Watch your thumb placement. Keep it behind the neck for better finger positioning and reach.
  • Use light pressure. Pressing too hard can make transitions sluggish and tire your hand.
  • Practice palm muting. Lightly resting your palm on the strings while strumming creates a tighter, more aggressive tone, which is essential for rock and metal.
  • Vary your picking dynamics. Alternate between light and heavy strumming to develop better articulation.
  • Learn songs, not just shapes. Play riffs from bands like Green Day, Black Sabbath, or Foo Fighters to internalize power chords in real musical contexts.

Take Your Power Chords to the Next Level

Mastering guitar power chords opens the door to countless riffs and progressions. The key is not just to play them, but to play them well with tight muting, dynamic control, and rhythm precision. Whether you’re jamming to classic rock or writing your own songs, power chords will always be one of your greatest tools.

additional open guitar chords add9, sus2 and sus4 by dan holton

Enhance Your Guitar Playing with Add9, Sus2 and Sus4 Open Chords

When learning guitar, mastering the standard chords is just the first step. To truly expand your musical vocabulary, you’ll want to explore variations like Add9, Sus2 and Sus4 chords. These chords aren’t just fancy names, they add depth, color, and a unique melodic twist that can transform your playing, even at a beginner level.

A Quick Look at What’s Ahead

  • Master popular variations like C add9, a comfortable alternative to C major.
  • Understand the tension and release of Sus2 and Sus4 chords.
  • Avoid common pitfalls when learning these new chords.
  • Practical tips for integrating these chords into your practice routine.

Discovering the Charm of Add9 Chords

Let’s start with the C add9, an especially beginner-friendly chord. Why so friendly? Because it’s an easy transition from a G chord, involving minimal finger movement. You simply move your fingers down one string, keeping the chord shape intact. This small shift produces a beautifully melodic chord, perfect for adding emotion and subtlety to your playing.

Another chord worth exploring is E minor add9. Imagine the sound of a regular E minor chord, but richer, fuller, with an added sense of mystery. This chord simply takes your standard E minor and introduces the 9th note, creating a powerful emotional effect.

Quick Tip:

  • Practice transitions between G and C add9 to strengthen finger agility.

Let’s Talk About Suspended Chords (Sus2 and Sus4)

Sus chords (short for “suspended chords”) are a fascinating area to explore. Unlike standard major chords, suspended chords remove the third and replace it either with the second note (Sus2) or the fourth note (Sus4). This subtle shift transforms the chord’s emotion and adds tension and resolution in your music.

The D sus2 and D sus4 chords are excellent examples. With D sus2, you replace the usual third note with the open E string. For D sus4, you simply add your pinky on the third fret of the high E string. It’s that small shift that completely changes the chord’s personality.

Be cautious, though: beginners often mistakenly mute the open strings, losing the chord’s resonance. Always ensure each note rings clearly.

Why Not Evolve Your E Chords?

E chords also offer beautiful variations. Take the E major add9 for instance: this chord is ideal for adding brightness to a chord progression. To achieve this chord, hold your standard E major shape and add your little finger to the second fret of the high E string. It’s straightforward yet incredibly effective.

Common Mistakes and How to Avoid Them

Exploring these chords is exciting, but beware of these typical beginner errors:

  • Not fully pressing strings: Leads to buzzing or muted sounds. Apply firm but relaxed finger pressure.
  • Ignoring rhythm and timing: When incorporating new chords, keep rhythm in mind. Play slowly to internalize each chord shape clearly.
  • Overlooking finger positions: Regularly check your finger placement to avoid developing bad habits.

Practical Ways to Include These Chords

Start by incorporating them into familiar chord progressions. For example:

  • G – C add9 – D sus4 – D
  • A – A sus2 – A – A sus4

This practice will help you recognize and use these chords confidently during improvisations and songwriting sessions.

Key Takeaways:

  • Add9 chords enrich standard chords with harmonic depth.
  • Sus chords introduce tension and resolve beautifully.
  • Regularly integrate these chords into your practice sessions for maximum benefit.

Get Creative with Additional Open Guitar Chords

Whether you’re strumming around a campfire or composing your next song, integrating Add9, Sus2, and Sus4 chords can make your guitar playing genuinely stand out. Embrace these chords, practice regularly, and watch your musical skills reach new heights!

open major 7th guitar chords by dan holton

Mastering Open Major 7th Guitar Chords for Beginners

Why Major 7th Chords Sound So Good (and Why You Should Care)

Open Major 7th guitar chords offer an instantly recognizable, mellow sound that resonates well in jazz, pop ballads, and acoustic styles. They owe their relaxed, sophisticated quality to the addition of the major seventh note, subtly transforming basic major chords into more interesting musical shapes. Learning these chords not only broadens your musical vocabulary but also encourages you to explore new styles and chord progressions early in your guitar journey.

Major 7th chords might initially seem intimidating, but they’re approachable once you understand their structure. These chords are often found in iconic songs by artists like John Mayer, Norah Jones, and Jack Johnson, offering a practical gateway into playing popular music.

Key Takeaways:

  • Open Major 7th chords provide a richer, smoother sound than standard major chords.
  • Beginners typically start with chords like C Major 7, D Major 7, F Major 7, and A Major 7.
  • Learning the chord construction aids in grasping more complex chord theory later.

Getting Comfortable with Open Major 7th Guitar Chords

The concept behind open Major 7th chords is straightforward: take your basic major chord shape and adjust just one note (the root) down by a single semitone. However, beginners frequently encounter challenges with finger placement or unintentionally muting strings.

A good starting point is the C Major 7 chord. Derived from the familiar C major, simply lift your first finger off the B string (first fret). The open B note creates the necessary major seventh interval, immediately giving your playing a gentle jazz flavor. Keep in mind that beginners often mistakenly mute the open strings when learning new shapes; strive for clear, ringing notes by checking each string individually.

Moving on to the D Major 7 chord, this follows a similar concept. Form a regular D major chord and lower the high root note (the note on the second fret of the high E string) by one fret. Many guitarists prefer using a single finger barre or employing three separate fingers whichever feels more natural. It’s crucial to practice slowly, ensuring each note rings clearly.

Navigating Slightly Trickier Shapes: F Major 7 and A Major 7

The F Major 7 chord presents a slightly greater challenge, but mastering it pays dividends. Instead of the standard barred F chord, keep the high E string open. Your fingers form a diagonal shape (third fret D string, second fret G string, first fret B string), which might initially feel awkward. This shape, though tricky at first, improves your finger independence and accuracy.

A Major 7 feels more intuitive: start with a standard A major chord, then shift the middle note (on the G string) back one fret. It’s common for beginners to accidentally press too hard or angle fingers incorrectly, so regularly check your technique and adjust finger positioning accordingly.

Tips from the Teaching Studio

  • Integrate major 7th chords into familiar songs to understand their context better.
  • Use slow, deliberate practice to achieve clean chord changes and avoid common pitfalls like muted strings or buzzing.
  • Pay attention to finger angles and avoid unnecessary tension in your hands and wrists.

Dive into Open Major 7th Guitar Chords Now

Start incorporating these chords into your practice sessions today, and you’ll quickly notice an improvement in your overall guitar playing. Remember, perfection isn’t the goal right away, it’s about steadily gaining comfort and confidence with these versatile, rewarding chords.