open minor 7th guitar chords by dan holton

Mastering Open Minor 7th Guitar Chords for Beginners

Learning open minor 7th guitar chords can genuinely expand your playing, introducing a richer sound palette to your music. These chords are especially appealing for beginners because they strike a balance between straightforward finger placement and intriguing musical depth. If you’ve been stuck playing only major or basic minor chords, exploring minor 7th chords could be your next valuable step.

Key Takeaways:

  • Minor 7th chords merge minor chords with a flattened seventh note.
  • Common beginner-friendly minor 7th chords include D minor 7, E minor 7, and A minor 7.
  • Clearly playing the flattened seventh note is essential for chord definition.

What Exactly Are Open Minor 7th Chords?

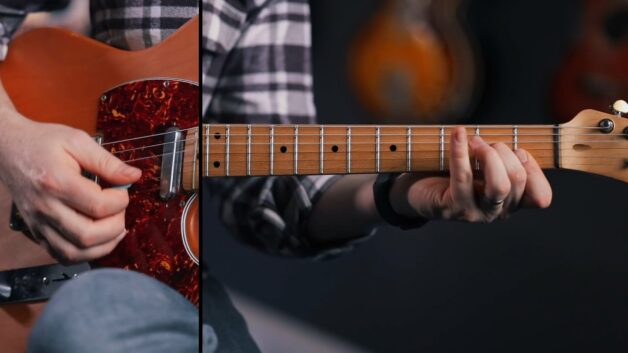
Open minor 7th guitar chords combine a minor triad with an additional flattened seventh note, creating a distinctive, moody sound often heard in jazz, blues, pop, and rock. For instance, the D minor 7 chord involves barring the first fret with your index finger and placing your middle finger on the second fret of the third string. This positioning lets the open D string resonate naturally, providing depth to the chord.

While the barre method may initially feel awkward to beginners, an alternative, simplified fingering can also achieve a similar result. Experimenting with different finger placements can alleviate discomfort and help you find a technique that works best for your hand shape and guitar neck profile.

A Quick Historical Detour: Why These Chords Matter

Historically, open minor 7th chords have featured prominently in popular music. Think about classic songs like “Wonderwall” by Oasis, which extensively uses variations of the E minor 7 chord, giving the song its memorable introspective feel. Learning minor 7th chords is not just about adding complexity, it’s about tapping into musical traditions that have influenced countless guitarists and songwriters.

Practical Tips and Common Challenges

When practicing minor 7th chords, precision matters. Many beginners unintentionally mute the essential flattened seventh note due to improper finger placement or pressure. A common mistake is positioning fingers too far behind the fret, causing buzzing or unclear notes.

Make sure your fingers land close to the fret wire, applying steady, gentle pressure. Also, experiment with wrist positioning and guitar angle. Slight adjustments can significantly improve comfort and clarity.

For the E minor 7 chord, beginners often struggle with clarity. A simpler way is playing the standard E minor shape but emphasizing the open D string, where the flat seventh resides. If you’re more confident, try adding the higher-pitched G note for added texture. This approach captures the sound famously employed by bands like Oasis.

The A minor 7 chord offers a more straightforward experience for beginners. Simply lift your finger off the G string while maintaining the standard A minor chord shape. Remember, the open G string must ring clearly, as it represents your flattened seventh note.

Integrating Minor 7th Chords Into Your Playing

Introducing open minor 7th guitar chords into your daily practice routine not only expands your musical vocabulary but also strengthens finger dexterity. Try incorporating these chords into chord progressions you already know or songs you’re currently practicing.

  • Prioritize clarity: Ensure each note rings out distinctly.
  • Experiment slowly: Give yourself time to adapt to new shapes.
  • Check pressure: Avoid pressing too hard or too softly.

Start integrating open minor 7th guitar chords into your playing today and discover new creative possibilities on your guitar journey.

open 7th guitar chords by dan holton

Mastering Open 7th Guitar Chords: Your Essential Beginner Guide

What Exactly Are Open 7th Guitar Chords?

Open 7th guitar chords, commonly known as dominant seventh chords, hold a unique place in music due to their characteristic bluesy and slightly unresolved sound. These chords often appear in genres like blues, jazz, funk, and even rock, making them essential tools in any guitarist’s skill set. While beginners typically start with simple major and minor chords, introducing open 7th chords into your practice routine early can significantly enhance your musical vocabulary.

Dominant seventh chords are built by adding a flattened seventh note to the basic major chord structure. Unlike standard major chords that sound stable and resolved, the added flattened seventh creates tension that begs for resolution, making these chords incredibly expressive.

Essential Open 7th Guitar Chords (Without Getting Lost in Theory)

When starting out, understanding basic shapes is more valuable than deep music theory. Let’s look at practical examples of common open 7th chords:

C7: This chord alters the shape of the G major by lowering the high note to the minor seventh (first fret on the high E string) giving it a distinctly bluesy character.

D7: Derived from the standard D major shape. Move your fingers to fret the second fret (G string), first fret (B string), and second fret (high E string). This chord is popular in classic blues and early rock-and-roll songs.

E7: Perhaps one of the simplest alterations: just lift your third finger from a regular E major chord. Optionally, you can place your little finger on the third fret of the B string to add a brighter top-end note.

G7: This chord adjusts the G major shape by shifting the bass note down to the flat seven, making it slightly more challenging but highly rewarding for the bluesy feel it adds.

A7: Possibly the easiest open 7th chord, formed by removing the middle note from the traditional A major shape. It’s a chord beginners typically master quickly due to its simplicity.

B7: in open position is especially useful for accompanying songs in E major, as it allows for a smooth and natural transition to E thanks to its easy-to-remember shape. Simple chord shapes like C7, D7, E7, G7, A7 and B7 help you build a diverse chord vocabulary.

An informal tip: your nails matter! Short fingernails significantly ease the pressure needed to fret these chords cleanly, preventing muted strings and buzzing sounds, common beginner frustrations.

Common Beginner Challenges (and How to Overcome Them)

Many new guitarists struggle with clear chord transitions and clean sound production. If your chords initially sound muddy or unclear, don’t worry. Focused daily practice (even for 10-15 minutes) can significantly improve your finger strength and precision.

Some useful reminders to keep in mind:

  • Open 7th chords naturally sound less “finished” than major chords. Embrace their tension!
  • Regularly check your hand posture to avoid accidental muting of adjacent strings.
  • Practice transitions slowly at first; speed and smoothness come naturally with repetition.

Key Takeaways

  • Open 7th chords are foundational for blues, jazz, and many other styles.
  • Short nails facilitate clear playing and minimize beginner struggles.

Start incorporating open 7th guitar chords into your practice today. It’s an excellent way to build technical skill, explore various musical styles, and add authenticity to your playing.

open minor guitar chords by dan holton

Mastering Open Minor Guitar Chords: A Beginner’s Guide

Learning open minor guitar chords is a fundamental milestone for any aspiring guitarist. These chords not only allow you to play countless well-known songs (think classics like “House of the Rising Sun” by The Animals) but also significantly deepen your understanding of the instrument’s tonal range. However, beginners often struggle with finger placement and achieving clean, resonant chords. Rest assured, these challenges are entirely normal and can be overcome with consistent practice and correct technique.

Key Takeaways:

  • Understand the formation of essential open minor chords: D minor, E minor, and A minor.
  • Gain insights into correct finger placement and practical chord transitions.
  • Recognize and avoid common beginner mistakes.

Getting to Know the Essentials: D Minor, E Minor, and A Minor

Let’s dive right in by exploring three crucial open minor guitar chords that will quickly become your go-to in various musical contexts.

D minor is often described by guitarists as one of the more emotionally expressive chords. To play it, begin with your open D string, then place your middle finger on the second fret of the G string, your ring finger on the third fret of the B string, and your index finger on the first fret of the high E string. Alternatively, some guitarists prefer using their pinky on the third fret of the B string for added comfort, especially when quickly transitioning to chords like C major or F major. It’s common to initially mute strings unintentionally, so take your time to ensure each note rings clearly.

Use the second finger for the string on the second fret and the third finger for the D string on the second fret. Usually the index and middle or middle and ring on the second fret of both the A and D strings, leaving all other strings open. This chord appears in countless songs and offers an ideal starting point for beginners to build confidence. It’s worth noting that famous guitarists like Kurt Cobain frequently utilized E minor’s simplicity and richness in their compositions.

A minor closely resembles the shape of E minor but is shifted downward. Place your middle finger on the second fret of the D string, your ring finger on the second fret of the G string, and your index finger on the first fret of the B string, with the open A and high E strings resonating clearly. Mastering A minor also helps you smoothly transition to chords like E major or C major, crucial for songs across genres, from blues standards to modern pop hits.

Practical Tips for Seamless Chord Transitions

Chord transitions can feel awkward initially, a frustration common among new guitarists. Here are practical tips to streamline your transitions:

  • Slow down your practice to focus explicitly on finger placement and clarity.
  • Minimize finger movement by identifying shared finger placements between chords.
  • Regularly check for muted strings or buzzing sounds, adjusting your fingers slightly as necessary.

Teaching tip: Encourage yourself by practicing chord progressions found in songs you genuinely enjoy. This enhances motivation and makes practice sessions more engaging.

Watch Out for These Common Pitfalls

Beginners frequently press too hard on the fretboard, causing unnecessary finger fatigue and affecting chord clarity. Always aim for a firm but gentle pressure. Additionally, avoid bending strings unintentionally, which often happens when fingers are not positioned close enough to the fret. Paying attention to these subtle details early on will help you develop precise playing habits.

Integrate Open Minor Guitar Chords into Your Routine

Incorporating these foundational open minor guitar chords into your daily practice will quickly build your musical vocabulary and finger dexterity. Aim to practice consistently rather than intensely: frequent short sessions often yield better results than infrequent lengthy ones. Keep exploring new songs and chord progressions, and you’ll soon experience the natural fluidity and ease every guitarist seeks.

open major guitar chords by dan holton

Mastering Open Major Guitar Chords: Essential Tips for Beginners

Learning open major guitar chords is an essential first step for every guitarist, forming the foundation for playing numerous songs and styles. While initially challenging, becoming proficient in these chords provides a strong musical foundation. Many legendary guitarists, from Bob Dylan to Joni Mitchell, began their journeys by mastering these essential chord shapes, underscoring their importance in your musical development.

Key Takeaways

  • Open major chords require at least one open (unfretted) string.
  • Essential chords include C, D, E, G, and A major.
  • Thumb placement and finger positioning significantly influence chord clarity.
  • Capos allow beginners to explore different keys using familiar chord shapes.

Understanding Open Major Guitar Chords

Open major guitar chords feature at least one open string, which provides their distinct resonance and clarity. Historically, guitarists from classical composers to rock legends have utilized these chords to craft memorable melodies. However, beginners often struggle with finger placement and ensuring each note rings clearly, a challenge every guitarist has faced.

For instance, the C major chord, foundational in guitar learning, can initially feel difficult due to the stretch required by the fingers. A practical approach is to first position your index and middle fingers and then gradually introduce your ring finger. Maintaining your thumb comfortably behind or over the guitar neck can also make a significant difference, allowing better leverage and less wrist strain.

Essential Open Major Guitar Chords and Common Challenges

The D major chord is comparatively straightforward. Yet, beginners frequently encounter muffled sounds caused by accidental muting of adjacent strings. Ensuring fingers approach the fretboard vertically helps achieve clear resonance. Similarly, the E major chord, despite its seemingly straightforward shape, can present challenges in cleanly pressing down the first fret on the G string without affecting neighboring strings. Patience and slight hand adjustments usually resolve this common issue.

G major, known for its versatility, offers several variations. A simple form involves pressing only the third fret of both E strings while leaving other strings open, although more complex fingerings, involving additional fingers, create fuller sounds. Historically, variations of the G major chord have featured prominently in folk and rock classics, offering beginners context and inspiration as they practice.

The A major chord is unique as it requires three fingers on a single fret. This compact positioning can lead to unintentionally muting strings. A common tip from music teachers is to slightly angle your fingers, rather than laying them flat, to help all strings resonate clearly.

Using a Capo: Expanding Your Musical Horizons

While a capo isn’t essential initially, incorporating one early can significantly enhance your playing experience. Famous musicians, from The Beatles to modern singer-songwriters, frequently use capos to experiment effortlessly with different musical keys without relearning complicated chord shapes. This technique allows beginners to expand their musical repertoire quickly, maintaining motivation while improving versatility.

By deeply engaging with open major guitar chords, you’ll not only build a solid foundation but also connect with the larger tradition of guitar playing, mastering essential skills that countless musicians have relied upon throughout history.

mark knopfler (dire straits) guitar sound by julien bitoun

How to Achieve the Mark Knopfler Guitar Sound from “Money for Nothing”

Many guitarists, especially beginners, struggle to capture the exact sound of iconic musicians. Mark Knopfler’s tone on Dire Straits’ “Money for Nothing” stands out because it’s quite different from his usual bright, snappy Stratocaster sound heard on tracks like “Sultans of Swing.” Instead, Knopfler went for something thicker, more robust, and packed with mid-range punch, perfectly matching the song’s gritty attitude.

Key Takeaways:

  • Mark Knopfler used a Les Paul guitar, a departure from his usual Fender Strat.
  • A heavy, mid-focused distortion defines the “Money for Nothing” tone.
  • The secret ingredient: a wah pedal set in a fixed position.

Behind the Tone: Choosing the Right Gear

It’s common for beginners to assume that Mark Knopfler always plays his iconic red Stratocaster, but “Money for Nothing” showcases his versatility using a Gibson Les Paul. He specifically employed the guitar’s bridge humbucker, giving him a powerful output that’s rich in mids and capable of achieving a thick distortion. For many beginners, adapting to the differences between single-coil and humbucker pickups can feel challenging initially. Each requires subtle adjustments in playing style and gear settings.

Interestingly, Knopfler’s gear choice for this track included a small Laney amplifier, which wasn’t his typical setup. Though uncommon at the time, Laney amps offered a distinct British crunch. Since this exact amplifier is rare today, guitarists often rely on pedals that mimic British-style distortion, such as the Way Huge Superlead. By turning the drive up to about three o’clock, you’ll push your pedal into heavy distortion territory, just right for capturing the signature tone. Remember, too much brightness can ruin this tone, so keep the pedal’s tone knob rolled back, roughly around ten o’clock.

A Little Ambience Goes a Long Way

While experimenting with distortion, many beginners overlook the critical role of reverb. On “Money for Nothing,” there’s significant plate reverb used to emulate a studio ambience, contributing greatly to the overall feel of the song. Don’t be timid: turning the reverb mix higher can dramatically enhance your tone. Just be cautious: too much reverb can muddy your playing, especially during solos or intricate rhythm sections.

The Secret Sauce: The Fixed Wah Technique

Guitar history is full of clever little tricks guitarists use to create signature tones. Knopfler employed a “parked” wah pedal, an approach popularized by guitar legends like Frank Zappa and Michael Schenker. Setting your wah pedal in one position boosts specific mid-range frequencies, giving your guitar a vocal-like quality. This technique requires patience; you’ll need to carefully tweak the pedal’s position to find the perfect resonant frequency. Once it’s dialed in, resist the urge to move it, that sweet spot is crucial to maintaining the iconic sound.

If you’re having trouble initially, you’re not alone. Beginners frequently overuse wah pedals, resulting in a tone that’s too sharp or harsh. Instead, subtlety and patience are key. Finding the right position can transform your tone from average to impressive.

Final Tips for Your Practice

  • Use a guitar equipped with a humbucker pickup, preferably in the bridge position.
  • Select a British-style distortion pedal to emulate the Laney amplifier.
  • Experiment thoroughly with your wah pedal’s position before committing to your final tone.

By carefully following these recommendations, you’ll be well-equipped to emulate one of rock’s most recognizable guitar sounds. Dive in, experiment thoughtfully, and don’t hesitate to revisit your settings regularly as your ears and skills develop.

metallica guitar sound by julien bitoun

How to Achieve the Iconic Metallica Guitar Sound

If you’ve ever listened to Metallica’s groundbreaking “Black Album,” you’ve experienced a masterclass in heavy metal guitar tone. Achieving the distinctive Metallica guitar sound at home isn’t simple, but it’s certainly achievable (even for beginners). Many guitarists initially struggle to replicate this tone because it’s not just about cranking up the distortion; the nuances matter.

Key Takeaways:

  • Metallica’s signature sound relies heavily on humbucker pickups and high-gain amplifiers.
  • Mid frequencies are critical: finding the right balance is essential.
  • Specific pedals like distortion, delay, and wah-wah are key to capturing the band’s tone.

Getting Started with Humbuckers and High-Gain Amplifiers

To approach the Metallica guitar sound, you’ll first need a guitar fitted with a humbucker pickup. Humbuckers, particularly at the bridge position, deliver the aggressive, high-output tone central to Metallica’s music. A single-coil pickup, common in guitars like the Fender Stratocaster, typically won’t provide the necessary thickness and sustain needed for heavier riffs like those found in “Enter Sandman” or “Sad But True.”

Many beginner guitarists attempt this tone with insufficient amplification or distortion. Metallica used powerhouse amps like Mesa Boogie Dual Rectifiers and Marshall stacks on the Black Album, but fortunately, you don’t need to own vintage tube amps to get close. A reliable distortion pedal, like the MXR Fullbore Metal, can be more practical and accessible for beginners.

Dialing In Your Tone – Avoiding Common Pitfalls

While dialing in your tone, beginners often excessively scoop the midrange frequencies, hoping for a heavy sound, and end up with a thin, weak tone. The real Metallica secret lies in balancing the mids. Slightly scooping the mids, keeping the control around 10 o’clock, allows your guitar sound to remain thick and aggressive without losing essential presence.

Additionally, carefully adjust the frequency control knob to around 2-3 o’clock. This adjustment effectively sculpts the mids, giving you the distinct sound heard in classics like “Master of Puppets” or “Seek & Destroy.” Pay close attention to your bass and treble settings as well. Too much low-end can muddle your riffs, and overly aggressive highs might make your sound harsh and unpleasant.

The Art of Adding Subtle Effects

Beyond distortion, subtle effects can significantly enhance your Metallica guitar sound. For instance, adding a touch of plate reverb mimics the spacious studio environment from tracks like “Nothing Else Matters.” Beginners often overlook this step, missing out on that professional touch.

When soloing, Metallica’s lead guitarist Kirk Hammett often uses a delay pedal like the MXR Carbon Copy to enrich his solos. Delay should be subtle: set the repeats low and the delay time short to avoid muddying your playing. And, of course, don’t overlook the wah pedal. A Crybaby wah can transform your solos, especially on tracks like “Enter Sandman,” giving you that expressive, vocal-like quality synonymous with Hammett’s style.

Practical Tips to Remember:

  • Avoid maximum distortion settings; clarity is essential even in metal.
  • Practice switching your pedals smoothly to maintain your rhythm and tone.
  • Experiment gradually with EQ settings to find what works best with your guitar and amp combination.

By carefully adjusting your gear and paying attention to common pitfalls, you can achieve a convincing Metallica guitar sound. It requires patience and precision, but the results are well worth the effort.

scotty moore (elvis presley) guitar sound by julien bitoun

How to Get the Iconic Scotty Moore Guitar Sound

Curious about that distinctive guitar tone in Elvis Presley’s classic “Mystery Train”? That’s the unmistakable sound of Scotty Moore, the legendary guitarist behind Elvis’s early Sun Records hits. Capturing the Scotty Moore guitar sound is not just about gear; it’s about understanding the subtle techniques and challenges faced by beginner guitarists when approaching vintage tones.

Key Takeaways:

  • Scotty Moore’s tone combines warmth and clarity with a distinct vintage quality.
  • Achieving this tone relies heavily on precise EQ settings and vintage-inspired effects.
  • Slapback delay and spring reverb are essential to replicate Moore’s sound accurately.

Understanding the Magic Behind Scotty Moore’s Tone

Scotty Moore famously used the Gibson ES-295, a classic archtop jazz guitar renowned for its full-bodied resonance. Beginner guitarists often underestimate how much a guitar’s construction affects sound. Choosing the bridge pickup on a humbucker-equipped guitar is a critical first step because it offers the necessary balance between warmth and bite.

Interestingly, Moore’s style evolved from jazz and country traditions, blending them effortlessly into rockabilly. This fusion highlights an essential music-teaching insight: your musical background shapes your playing style more profoundly than gear alone.

Fine-Tuning Your Sound: EQ and Pedal Adjustments

Once you’ve chosen your guitar, shaping the tone becomes paramount. Moore’s guitar had a warm midrange, commonly described as “wooliness,” which beginners often struggle to replicate clearly. A useful starting point is using an MXR 6-band EQ pedal. Boosting frequencies around 400 Hz by approximately 9 dB brings out that authentic midrange warmth. A gentle increase around 800 Hz further enhances tonal depth, but don’t overdo it. Excessive EQ can muddy your sound.

Another challenge beginners frequently encounter is replicating vintage amplifier characteristics. Scotty Moore relied on rare Ray Butts amplifiers, beloved for their built-in tape echo. While such amplifiers are virtually impossible to find today, a pedal like the GTO-D can approximate the sought-after “mid-range bark.” Keep your gain low. Beginners often mistakenly crank this up, losing clarity. Instead, set gain at zero, and output and tone around noon for the best balance between clarity and subtle distortion.

Adding Authentic Effects: Slapback and Spring Reverb

Vintage recordings from the ’50s often featured prominent spring reverb, adding a spacious quality that many beginners initially overlook. It’s wise to incorporate subtle spring reverb to replicate the ambiance of early Sun Studios recordings. Be cautious not to overuse this effect, as excessive reverb can create an indistinct, overly “washed-out” sound.

Slapback delay, famously heard on Elvis’s vocals and Moore’s guitar, truly defines this iconic guitar sound. When setting up slapback with a pedal like the MXR Carbon Copy, aim for just a single repeat by setting the “regen” control at zero. Position the “mix” knob around 11 o’clock and use a short delay time to closely imitate a doubling effect. Beginners often mistakenly increase the number of repeats, which reduces clarity and authenticity.

Putting it into Practice

Working on iconic tones, such as Scotty Moore’s guitar sound, provides a rich context for beginners to learn technical guitar playing while appreciating musical history. Remember, precise adjustments and patience are key. Explore this approach by playing along with early Elvis Presley recordings, and don’t be discouraged if the sound takes time to perfect. Great guitar tones are developed through practice and careful listening.