dick dale guitar sound by julien bitoun

How to Achieve the Dick Dale Guitar Sound: A Beginner’s Guide

Capturing the legendary Dick Dale guitar sound, famously known as the “King of Surf Guitar,” is often a challenge for beginners due to its distinct characteristics. Dick Dale’s tone, a blend of shimmering highs and robust lows, defined the surf rock genre in the early 1960s. This sound isn’t just iconic, it’s a great study for beginners looking to explore unique guitar techniques and equipment.

Key Takeaways

  • Use specific guitar and pickup settings.
  • Aim for a Fender-style amplifier sound.
  • Carefully apply EQ to match Dale’s frequency profile.
  • Authentic spring reverb is essential.

Choosing the Right Guitar Setup

To approximate the Dick Dale guitar sound, beginners often face the immediate challenge of equipment constraints. Dale famously played a Fender Stratocaster, particularly emphasizing the brightness of the bridge pickup. If a Stratocaster isn’t available, a common workaround involves using the middle pickup on guitars equipped with multiple pickups.

Here’s a quick tip: Avoid combining pickups, as this can produce an “out of phase” sound. Instead, isolate the middle or bridge pickup to achieve the clearest, most focused tone.

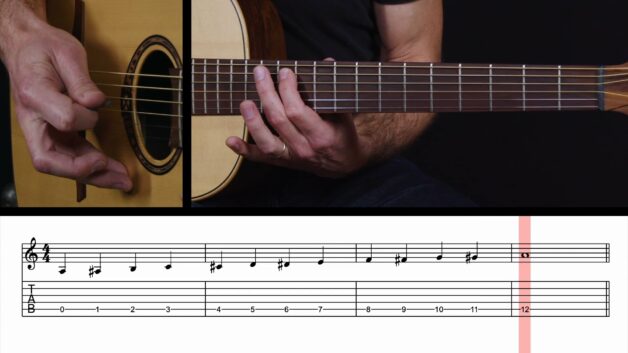
Dick Dale notably used thick guitar strings for added tension, enhancing his powerful and aggressive playing style. Beginners might initially find heavy-gauge strings tough on their fingers. To make practice manageable, consider using medium gauge strings as a compromise. Over time, your hands will build strength, preparing you for heavier strings and more authentic surf sounds.

Amp and Pedal Choices to Mimic Fender Character

Dick Dale famously played through the Fender Showman amplifier, prized for its deep lows and clear highs. Given that such vintage equipment might be impractical or expensive for beginners, using a pedal designed to emulate the Fender amp sound is a practical solution. For instance, the MXR GTO-D pedal set with zero gain provides tonal warmth and brightness reminiscent of Fender amplifiers. Adjusting the tone knob around two o’clock helps achieve that bright, piercing quality central to Dale’s style.

Shaping Your Tone – The Importance of EQ and Reverb

Surf guitar is heavily reliant on careful equalization (EQ), and beginners often underestimate its impact. Dick Dale’s signature sound featured boosted frequencies that highlighted the unique qualities of his amplifier and guitar setup. A common mistake beginners make is overly boosting high frequencies, which can result in an overly harsh tone.

Instead, aim for a more balanced EQ:

  • Increase around 400 Hz to replicate Dale’s rich, low-end punch from the 15-inch speakers he famously used.
  • Slightly boost around 800 Hz for that characteristic Fender-style midrange warmth.
  • Significantly boost around 1.6 kHz for the distinctive bright tone typical of surf rock.

A quick historical side-note: early surf guitarists like Dick Dale didn’t have built-in reverb units in their amps. Instead, they relied on external Fender spring reverb units. Replicating this setup today requires a quality spring reverb pedal. The MXR Reverb pedal, set on the spring setting with the mix at noon and tone around two o’clock, captures Dale’s vibrant, surf-oriented atmosphere.

When starting out, carefully managing the reverb effect is key. Too much reverb, a common beginner error, can muddy your tone. Keep your reverb settings moderate at first, then gradually increase as you become more comfortable with the effect.

Putting It All Together

Experimenting with these settings will gradually lead you to the authentic Dick Dale sound. Start by practicing recognizable surf classics such as “Misirlou” or “Pipeline.” Paying attention to each tonal adjustment will deepen your understanding of surf guitar’s distinctive qualities. Ultimately, mastering the Dick Dale guitar sound will significantly enhance your skills and confidence as a guitarist.

stevie ray vaughan guitar sound by julien bitoun

How to Achieve the Iconic Stevie Ray Vaughan Guitar Sound

Capturing the Stevie Ray Vaughan guitar sound isn’t just about dialing in the perfect settings, it’s a deep dive into one of music history’s most revered guitar tones. Stevie Ray Vaughan’s unique blend of power, clarity, and expressiveness shaped his unforgettable playing style. For beginners, striving to replicate his iconic sound can feel overwhelming initially, but it’s an excellent way to truly understand how guitar tone works.

Key Takeaways:

  • Use a Fender Stratocaster set to the second pickup position.
  • Maintain low gain on your Tube Screamer-style pedal.
  • Strategically boost midrange frequencies using an EQ pedal.
  • Include spring reverb to emulate classic Fender amp tones.

The Essentials: Gear Behind Vaughan’s Tone

Stevie Ray Vaughan predominantly used a Fender Stratocaster, usually favoring the second pickup position. This setting blends the bridge and middle pickups, delivering that distinctive, biting yet smooth sound famously heard in songs like “Pride and Joy” or “Texas Flood.” Many beginners struggle to find this exact balance, often choosing either too bright or too muddy a sound. So take your time to experiment with subtle adjustments.

Historically, Vaughan paired his guitars with vintage Fender amps, such as Vibroverbs and Super Reverbs, often combining several amplifiers on stage to enrich his sound. Realistically, these iconic amplifiers can be difficult (and expensive) to find, especially for beginners. A practical alternative is using a quality overdrive pedal, like the MXR GTOD, inspired by the legendary Ibanez Tube Screamer. A common beginner mistake is cranking the gain too high, resulting in excessive distortion. Vaughan’s sound was cleaner than many assume; keep your gain low, just enough to provide a subtle push that emphasizes mids without sacrificing clarity.

EQ and Reverb: Fine-Tuning Your Tone

Beginners often underestimate the role of EQ in shaping guitar tone. Stevie Ray Vaughan’s iconic sound was heavily defined by boosted midrange and high frequencies, creating a distinctive presence that easily cuts through a band mix. Using an EQ pedal like the MXR Six Band EQ, try boosting frequencies around 800 Hz and 1.6 kHz slightly. Adding a modest boost at 400 Hz also helps emulate the warmer, fuller sound characteristic of vintage Fender amps.

An informal note on reverb: Vaughan often used spring reverb, built into his beloved Fender amplifiers. It’s easy to get carried away, excessive reverb can muddy your tone. Keep it subtle. You want just enough to recreate that authentic, spacious feel without losing note definition.

Learning from Stevie Ray Vaughan: A Musical Journey

Aspiring to the Stevie Ray Vaughan guitar sound presents an excellent opportunity for beginners to develop their skills. It’s essential, though, to focus on improving your ear for tone rather than merely imitating gear. Listen carefully to Vaughan’s recordings, study his technique, and don’t get discouraged if it takes time. This is a learning process shared by many great guitarists.

Ultimately, your goal isn’t merely replicating Vaughan’s sound perfectly, but understanding the techniques and equipment behind it, paving the way to your own distinct guitar voice.

how to find the notes on a guitar neck by hubert boulogne

How to Find the Notes on a Guitar Neck: Beginner’s Guide

Getting Familiar with the Guitar Neck

For beginners, the fretboard of a guitar can seem overwhelming. Many new guitarists struggle initially, finding it difficult to quickly identify and remember notes. However, knowing how to find the notes on a guitar neck is crucial, not only for developing technical skills but also for understanding music theory and progressing more naturally in your guitar playing.

When you play a string without pressing down any fret, you’re playing an open note. Each guitar string has its own specific open note: E, B, G, D, A, and E, from the thinnest string (highest pitch) to the thickest (lowest pitch). To access other notes, you simply press down on different frets along the guitar neck. As you move your fingers closer to the guitar body, the notes become higher in pitch. Conversely, the closer you move toward the headstock, the lower the note sounds.

Interestingly, many beginners initially rely heavily on memorizing fret numbers rather than notes, which can make understanding harmony and improvisation more difficult later on.

Let’s Talk About Semitones

Every fret you move along the guitar neck represents a shift by one semitone, which is the smallest interval commonly used in Western music. After every 12 semitones, notes repeat, completing an octave. For clarity, there are seven natural notes (A, B, C, D, E, F, G) and five additional sharps or flats, totaling twelve distinct notes. A practical way to understand this progression is to practice moving up each fret and naming the note you’re playing.

It’s worth noting a couple of exceptions that often trip beginners up: B and E have no sharps, and similarly, C and F have no flats. Remembering these simple rules helps avoid confusion when navigating the fretboard.

How to Actually Remember the Notes (Without Losing Your Mind)

Let’s face it: memorizing every note on the guitar neck can feel overwhelming at first. A more manageable method is to start small: pick a single string and memorize its notes by moving fret by fret. Take the A string as an example:

  • Open A, then move along: A#, B, C, C#, D, D#, E, F, F#, G, G#, and back to A at the twelfth fret.

Once comfortable with one string, repeat the process with another. Eventually, patterns will emerge, and you’ll start recognizing notes more quickly.

Beginners often face frustration here, feeling stuck as though progress is slow. Remember, however, that recognizing notes on the fretboard becomes easier with regular, focused practice, even if it seems challenging at first.

A Little Trick to Speed Things Up

To speed up your fretboard knowledge, here’s a small tip: try relating new notes to notes you already know well. For example, if you’re confident identifying notes on the low E string, you can quickly find notes on the high E string. They’re identical, just two octaves apart. This relational approach can significantly simplify memorization and make the fretboard feel far less overwhelming.

Key Points to Remember:

  • Notes are separated by semitones, each fret representing one semitone.
  • Natural notes: A, B, C, D, E, F, G.
  • Sharps/flats: A#, C#, D#, F#, G# (same as Bb, Db, Eb, Gb, Ab).

Mastering how to find the notes on a guitar neck requires patience and practice, but this foundational knowledge will greatly enhance your ability to understand music theory, improvise solos, and communicate effectively with fellow musicians.

appoggiatura by dan holton

Understanding the Appoggiatura: An Essential Technique for Beginner Guitarists

When starting your guitar journey, encountering the term appoggiatura, or grace note, might feel daunting, but mastering it can truly enhance your playing. An appoggiatura is essentially a small ornamental note that smoothly precedes the primary note, adding expressiveness reminiscent of vocal nuances. You’ll often see these grace notes represented as tiny notations on guitar tablature or traditional sheet music, subtly enriching your melodies.

Key Takeaways

  • Appoggiaturas don’t have an independent rhythmic value.
  • They add emotional depth and vocal-like expressiveness.
  • Commonly played using hammer-ons, pull-offs, or slides.
  • Executed quickly and integrated smoothly within the same beat.

What Exactly Is an Appoggiatura?

An appoggiatura is more than just a decorative element, it’s a tool that adds richness to your playing. Unlike standard notes, it lacks a rhythmic value of its own, quickly blending into the note that follows. Think of it as a fleeting moment that enriches the listener’s experience, similar to a singer briefly gliding through a note rather than landing directly on it.

Historically, guitarists across genres, ranging from blues legends like B.B. King to classical maestros such as Andrés Segovia, have effectively used appoggiaturas to evoke deeper emotion and sophistication. As a beginner, grasping this subtle technique early on can significantly influence your growth and versatility as a musician.

How to Approach Playing an Appoggiatura

In practice, there are a few ways guitarists execute appoggiaturas: primarily through hammer-ons, pull-offs, and slides. While these terms might seem intimidating at first, understanding them can significantly improve your musical expression.

For instance, a hammer-on appoggiatura is executed by swiftly pressing down a finger onto a fret after playing an initial note. This is famously evident in guitar riffs from iconic tracks like “Layla” by Eric Clapton. A pull-off appoggiatura, on the other hand, involves lifting a finger slightly off the fretboard after sounding a note to transition seamlessly into the following tone, frequently found in blues solos. Lastly, slide appoggiaturas require smoothly gliding your finger along the string from one note to the next without lifting pressure, adding a vocal-like glide reminiscent of soulful melodies.

Common Mistakes and How to Avoid Them

Beginners often separate the appoggiatura into its own rhythmic beat, creating an unwanted staccato effect. Remember, the appoggiatura should swiftly transition into the main note within the same beat. Otherwise, you lose the intended smoothness and expressivity. Another frequent error is exerting too much finger pressure, especially with slides, leading to unintentional string bends and pitch inaccuracies. Practicing gently and slowly at first helps internalize correct finger placement and movement.

Teaching Tips to Master the Appoggiatura

If you’re finding appoggiaturas tricky, start by isolating the movement:

  • Hammer-ons: Clearly play the first note and then firmly hammer onto the next fret without picking again.
  • The pull-off: after playing a note, you remove your finger while slightly plucking the string with it, like a pick, to make the next note ring out. This technique is everywhere in blues solos.
  • Slides: Begin with short, controlled movements between adjacent frets to develop accuracy.

Patience is crucial here. Gradually increasing speed after mastering these movements slowly will solidify your skill and confidence.

Get ready to Enhance Your Guitar Playing with Appoggiaturas

Mastering the appoggiatura will significantly elevate your musical expressiveness. Delve into hammer-ons, pull-offs, and slides to experience firsthand how this subtle technique enhances your overall playing style. With consistent practice, you’ll soon find these ornamental notes becoming an intuitive, valuable part of your guitar toolkit.

anacrusis by dan holton

Understanding Anacrusis: Essential Guide for Beginner Guitarists

Ever noticed how some songs don’t start exactly on the first beat? That subtle introduction you hear is known as an anacrusis. This common musical device, also called a pickup note, helps musicians smoothly transition into the rhythm, setting a natural flow for both performers and listeners.

Key Takeaways:

  • An anacrusis leads into the main downbeat, usually shorter than a full measure.
  • Accurate counting is crucial to execute an anacrusis effectively.
  • Practicing with familiar songs enhances your sense of timing.

What Exactly is an Anacrusis?

In simple terms, an anacrusis is the musical phrase or note you play immediately before the first official beat of a piece. Think of the iconic opening of “Hey Jude” by The Beatles, where the singer gently leads listeners into the song. This subtle approach perfectly demonstrates an anacrusis in action.

Though the term may sound technical, anacruses are surprisingly intuitive. They’re commonly found in music across genres, from classical to contemporary pop, and offer guitarists a useful technique for achieving smoother musical entries.

Interestingly, beginner guitarists often struggle with timing an anacrusis correctly. A common challenge is starting the note or chord too early or too late, disrupting the rhythm of the entire piece. Remember, the goal of an anacrusis is to provide a smooth and seamless transition into the main beat.

Mastering the Art of Counting

Counting accurately isn’t just a suggestion, it’s essential. One practical teaching tip used frequently by music teachers is to count aloud clearly, perhaps even exaggeratedly at first. For example, counting “one, two, three, four,” and starting your pickup note exactly where it belongs helps internalize rhythm.

A useful practice method involves counting an empty measure before playing the anacrusis. This helps you and your bandmates (if you’re playing in a group) feel the rhythm internally before any notes are played. For example, an anacrusis begins before the first beat of the piece, as in Hey Jude. To spot it, start by counting an empty bar (1 2 3 4), then the first three beats of the next bar (1 2 3) before playing the fourth beat, which is the anacrusis.

It’s worth noting a common mistake: beginners often jump straight into the anacrusis without proper internal counting. This can result in sloppy transitions and difficulty syncing with other musicians. Always take a moment to internalize the rhythm before launching into your pickup notes.

Putting Anacrusis into Practice

When starting out, choose simple songs you know well that naturally incorporate pickup notes. Classics like “Stand by Me” by Ben E. King or the iconic riff of “Sweet Child O’ Mine” by Guns N’ Roses are great examples. As you progress, gradually explore songs with more challenging anacruses, or experiment by adding your own to familiar pieces.

Music teachers often advise practicing slowly first to master precise timing. Only speed up once you’re consistently hitting your anacrusis at slower tempos. Additionally, pay close attention to your favorite artists. Notice how they effortlessly integrate these subtle musical elements, making their performances seamless and engaging.

Ready to Explore Anacrusis?

Begin integrating the concept of anacrusis into your guitar practice sessions today. Mastering this simple yet impactful technique will significantly boost your musical confidence and rhythm. Whether playing solo or with a band, understanding and effectively utilizing an anacrusis will enhance your guitar playing skills dramatically.

6/8 time or compound duple meter by dan holton

Mastering 6/8 Time: A Beginner’s Guide to Compound Duple Meter

Ever tapped your foot to a melody and noticed it felt different from the usual 4/4 rhythm you’re used to? There’s a good chance you stumbled across a song in 6/8 time, often called compound duple meter. This rhythmic style might seem tricky at first, but it’s incredibly common, appearing in everything from classic folk ballads to rock anthems by bands like Queen (think of “We Are the Champions”) or Led Zeppelin (“House of the Holy”).

Key Takeaways:

  • 6/8 time divides each measure into two groups of three eighth notes.
  • Counting simple, repetitive phrases can help beginners internalize the rhythm.
  • Mastering this rhythm enhances musical versatility and creativity.

Why 6/8 Time Is Essential for Guitarists

Understanding 6/8 time is fundamental because it changes how you feel and play the rhythm. Instead of the steady “one-two-three-four” beat found in 4/4 time, 6/8 has a flowing “one-two-three, four-five-six” feel. Many beginners initially struggle with this shift because they’re so used to evenly dividing measures. But once you grasp the “feel” of compound rhythms, your playing becomes more expressive and nuanced.

Take, for instance, the classic folk tune “Scarborough Fair,” famously covered by Simon & Garfunkel. This song perfectly illustrates the lilting rhythm of compound duple meter, creating a gentle, swaying sensation. By learning songs like these, guitarists naturally internalize the unique rhythm and phrasing required by 6/8 time.

Getting Comfortable with the Rhythm (Without Getting Lost)

Here’s a practical teaching tip often recommended by experienced guitar teachers: associate rhythmic patterns with spoken phrases. The phrase “Bibbidi-Bobbidi” neatly fits the six-beat grouping and helps solidify timing without getting bogged down in numbers. Repeating phrases aloud while playing can significantly ease the learning curve and help you avoid common pitfalls, such as losing the rhythm halfway through a measure or unintentionally slipping back into 4/4 time.

However, beware of rushing! One of the most frequent beginner mistakes with compound meters is speeding up unintentionally. Using a metronome is essential here; set it at a slow tempo first and gradually increase speed as comfort grows. Also, practicing chord transitions with rhythmic phrases ensures that both your hands stay coordinated, which is especially crucial in more intricate rhythm patterns.

Simple Steps to Start Playing in 6/8

While there’s no magic shortcut, here are a few proven tips:

  • Practice familiar chords (G, C, D, and Em, for example) in a 6/8 pattern to build muscle memory.
  • Begin by counting or vocalizing rhythmic phrases before introducing chords.
  • Focus first on accuracy rather than speed to develop reliable timing.

Occasionally, stepping back and just listening to a variety of songs in 6/8 time can also deepen your intuitive sense of the rhythm. You’ll start to notice it everywhere, from blues classics to contemporary pop hits, once you become attuned to this unique feel.

Ready to Explore 6/8 Time

Taking time to understand and practice 6/8 time opens up an entirely new dimension in your guitar playing. It’s a rhythmic feel that allows you to express music differently and adds variety to your repertoire. Start exploring today and watch your musicality evolve naturally.

compound time by dan holton

Mastering Compound Time: Beginner’s Guide to Rhythm on Guitar

Compound time can feel confusing initially, especially if you’re accustomed to straightforward rhythms like 4/4, but it’s an essential rhythm style to learn for guitarists aiming to broaden their musical palette. Compound time, in essence, is a rhythmic structure where beats are divided into groups of three instead of two, creating a natural swing and flow in your playing.

Key Takeaways:

  • Compound rhythms group beats into sets of three rather than two.
  • Common examples include 6/8 and 12/8 time signatures.
  • Practicing triplets will make switching between simple and compound time more comfortable.

Understanding Compound Time Signatures: 6/8 and 12/8

If you’ve listened to blues, folk, or even some rock ballads, you’ve already encountered compound time signatures. Two popular examples of compound time are 6/8 and 12/8, each offering a unique rhythmic texture to your music.

In 6/8 time, each measure contains six eighth notes divided naturally into two groups of three. Counting these would go something like “1-2-3, 4-5-6,” giving the rhythm a flowing, circular feel. For example, many traditional folk songs or ballads by artists like Bob Dylan often use this rhythm to create a sense of gentle motion.

The 12/8 signature, meanwhile, extends the concept further, featuring four groups of triplets per measure: “1-2-3, 2-2-3, 3-2-3, 4-2-3.” This structure is popular in blues rhythms. Think of the classic blues shuffle rhythm you might hear in a Stevie Ray Vaughan track, creating that familiar, swinging groove.

Practicing Triplets: A Gateway to Mastering Compound Time

A common entry point into compound rhythms is mastering triplets, where each beat is divided into three even parts. Guitar students often struggle here at first because the natural instinct is to subdivide rhythms into two or four, not three.

To ease this transition, first establish a steady, slow pulse in simple 4/4 time. just count “1-and-2-and-3-and-4-and.” Then introduce triplets gradually by dividing each beat clearly: “1-2-3, 1-2-3, 1-2-3, 1-2-3.” This exercise helps internalize the feel of compound rhythm. Remember, the goal isn’t speed at first, but accuracy. Practice slowly with a metronome, gradually increasing tempo once comfortable.

Common Mistakes and Tips from Music Teachers

  • Avoid rushing: Many beginners speed up unintentionally when counting triplets. Using a metronome can help control this impulse.
  • Accent the first note of each triplet clearly: this subtle emphasis enhances the rhythm’s distinct swing.
  • Practice alternating between simple (“1-and-2-and-3-and-4-and”) and compound rhythms (“1-2-3, 1-2-3”) within the same exercise. This can greatly improve your rhythmic versatility.
  • Familiarize yourself with songs that use compound rhythms. Classics like “House of the Rising Sun” or blues standards by Muddy Waters are excellent practice references.

Enhance Your Guitar Playing with Compound Time

Embracing compound time in your guitar playing expands your rhythmic awareness, opening doors to more expressive and dynamic performances. Whether you’re delving into blues solos, strumming folk rhythms, or exploring jazz improvisations, mastering these time signatures will bring depth and sophistication to your musical expression.

Get started today: dive into the rhythm of compound time, and you’ll quickly notice your playing become more engaging and rhythmically precise.