introduction to rock guitar by julien bitoun

How to Play Rock Music on Guitar: Mastering Classic Rock Riffs and Rhythms

Where Rock Guitar Began: A Brief Dive into History

Before diving into how to play rock music on guitar, it’s worth stepping back to Memphis, Tennessee, around 1954. It was there that musicians like Elvis Presley, Carl Perkins, and Chuck Berry blended blues, gospel, and country music, creating a sound known as rockabilly. This fusion set the stage for future generations, paving the way for bands like The Beatles, The Rolling Stones, and The Who to redefine rock rhythms in the ’60s.

Interestingly, it was these British bands, initially inspired by American artists, who reintroduced Americans to their own rock heritage. By the 1970s, guitar riffs became heavier and more central, with bands like Led Zeppelin and Aerosmith shaping the hard rock and heavy metal movements. Knowing this context helps when trying to recreate authentic rock sounds, as each era brought different tonal characteristics and rhythmic nuances.

Essential Techniques for Playing Rock Music on Guitar

It’s Not Just About the Guitar, It’s How You Play It

When learning how to play rock music on guitar, beginners often gravitate towards power chords first. Power chords, typically made up of just the root note and the fifth, simplify the sound and eliminate unwanted harmonic clashes, making them ideal for distorted or crunchy tones. For example, AC/DC’s “Back in Black” is primarily built around these simple, yet powerful chords. However, don’t neglect open chords or even fourth chords (think Pete Townshend’s rhythm playing with The Who), as these can add a brighter, fuller sound.

One common challenge beginners face is the difficulty in maintaining clarity when adding distortion. A helpful teaching tip is to practice chords initially with a clean sound, then gradually introduce distortion. This way, you’ll clearly hear any muted strings or buzzing notes before adding complexity.

Also, rhythm technique is crucial. Your right hand is as important as your left, controlling the nuances like palm muting. If your riffs sound muddy or indistinct, chances are your palm muting needs adjustment. Too heavy-handed, and you lose sustain; too light, and the rhythm can sound messy.

Choosing the Right Gear for Authentic Rock Tones

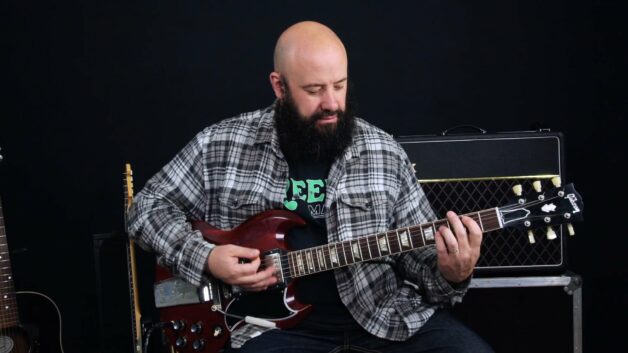
Many aspiring guitarists assume they need a specific guitar model to sound authentic. While certain guitars (such as a Gibson Les Paul or SG with humbucker pickups) naturally lend themselves to classic rock sounds, gear alone doesn’t guarantee success. Beginners should know that great rock rhythm comes from consistent right-hand technique and dynamic control rather than expensive equipment.

Of course, if you’re aiming for that signature heavy crunch, humbuckers combined with tube-driven amps will indeed get you closer. But keep in mind, historically, even iconic rock musicians didn’t always rely on high-end instruments. Jimmy Page famously recorded some early Led Zeppelin tracks on budget-friendly gear, proving technique outweighs equipment cost.

Key Takeaways to Master Rock Guitar Riffs and Rhythms:

  • Power chords simplify your playing and help control distortion.
  • Experiment with open and fourth chords for richer textures.
  • Master rhythm techniques like palm muting, hammer-ons, slides, pull-offs, and bending for more expressive playing.
  • Choose gear that suits your style but prioritize your playing skills first.

Common Pitfalls Beginners Should Avoid

A frequent mistake beginners make when learning how to play rock music on guitar is rushing into complex riffs without first mastering basic rhythm skills. Jumping straight into something like Led Zeppelin’s “Whole Lotta Love” might be tempting, but focusing on simpler riffs like Blur’s “Song 2” or The Rolling Stones’ “Satisfaction” can build foundational skills more effectively.

Another overlooked issue is timing and rhythm. Using a metronome or backing tracks can greatly improve your consistency. Yes, it may feel restrictive at first, but every seasoned guitar teacher agrees: strong rhythm skills define good rock guitarists.

Ready to Rock? Here’s Your Next Step

If you’re serious about learning how to play rock music on guitar, the best approach is to pick a specific song or riff that excites you and gradually work through it. Combine consistent practice with careful attention to technique, and you’ll soon recognize genuine improvements in your playing.
introduction to pop guitar by julien bitoun

How to Play Pop Music on Guitar: Mastering Rhythm and Tone for Beginners

What Exactly Makes Pop Guitar Sound “Pop”?

Pop music might seem deceptively simple at first, but mastering how to play pop music on guitar requires a subtle understanding of rhythm and tone. Unlike genres where guitar solos dominate, pop guitarists typically play with restraint, enhancing the overall sound without overshadowing the vocals. This means beginners often struggle initially overplaying chords, using excessive distortion, or competing with the singer. These common pitfalls can easily muddy the crisp clarity that characterizes the pop genre.

Interestingly, pop music itself originated as a short, radio-friendly form of music in the 1960s, closely linked to “pop art,” highlighting accessibility over complexity. Legendary bands like The Beatles and The Beach Boys defined early pop, setting benchmarks in melody and harmony rather than flashy technical skill.

Essential Guitar Gear: Getting That Authentic Pop Sound

When learning how to play pop music on guitar, choosing the right equipment genuinely matters. While some guitarists insist that “tone is in the fingers,” beginners will quickly discover how much easier it is to achieve an authentic pop sound with gear adapted to the style.

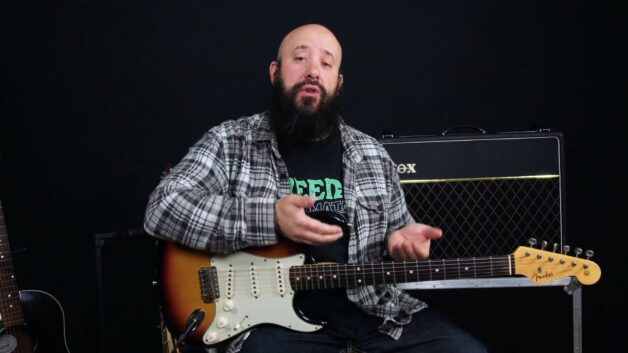
One classic guitar for pop is undoubtedly the Fender Stratocaster. With its versatile pickup combinations (particularly positions two and four on the selector switch), the Strat provides a clear, bright tone that cuts through busy mixes without overwhelming other instruments. Pairing this guitar with a Vox-style amplifier further enhances your tonal options, providing crisp clean tones as well as slightly crunchy textures ideal for rhythm playing.

Another crucial element of pop guitar tone is effects pedals. The dotted eighth-note delay, famously popularized by The Edge of U2, creates rhythmic layers and a sense of spaciousness around simple guitar riffs. However, beginners must exercise caution: overusing delay effects can quickly lead to confusion in rhythm, turning what was intended as a tasteful embellishment into sonic chaos.

The Rhythm Game: Techniques Every Beginner Should Know

Pop rhythm guitar is fundamentally different from traditional folk or rock strumming patterns. Beginners often mistakenly try to strum all six strings consistently, creating unnecessary sonic clutter. Instead, pop arrangements typically rely on triads (three-note chords) or partial chord voicings. This approach allows the guitar to occupy just enough harmonic space to support the song’s melody without becoming intrusive.

Take, for example, Coldplay’s “Clocks” or “Where the Streets Have No Name” by U2. Both songs use rhythmic delays and minimal chord voicings to build their unmistakable textures. A helpful teaching tip here is to encourage students to practice playing fewer strings intentionally, focusing on clarity rather than volume. Additionally, techniques like palm muting become essential tools to create dynamic contrasts and rhythmic precision, especially when paired with delay pedals.

Common mistakes to avoid:

  • Using overly complex chord voicings that compete with vocal melodies.
  • Strumming too aggressively or too broadly, which drowns out subtle arrangements.
  • Over-relying on effects instead of developing rhythmic accuracy first.

Adding Flavor: Small Techniques That Make a Big Difference

Though rhythm remains central to pop guitar playing, adding expressive techniques like slides, hammer-ons, pull-offs, vibrato, and ghost notes can elevate your playing from merely accurate to genuinely compelling. These subtle embellishments, when tastefully applied, create interest and emotion without adding clutter.

A practical tip for beginners is to start by adding one or two embellishments into familiar chord progressions. For instance, practicing sliding between chords, or integrating a simple hammer-on into a progression found in popular tracks like R.E.M.’s “Losing My Religion,” can significantly enhance your musicality without overcomplicating the performance.

Key Takeaways for Beginners:

  • Pop guitar prioritizes rhythmic clarity and harmonic simplicity.
  • Equip yourself thoughtfully: Stratocaster guitars, Vox-style amps, and delay pedals define the pop sound.
  • Focused strumming with triads and partial chord shapes enhances vocal arrangements.
  • Use expressive techniques sparingly to enrich your playing.

By balancing rhythm, tone, and subtlety, beginners can confidently approach pop guitar with genuine authenticity.

introduction to blues guitar by julien bitoun

How to Play Blues Music on Guitar: A Beginner’s Essential Guide

Why Blues Matters (and How You Can Master It)

Learning how to play Blues music on guitar isn’t just about mastering chords and rhythms; it’s about connecting deeply with a rich musical heritage. The blues isn’t merely a style, it’s the cornerstone of nearly every modern music genre you enjoy today, from rock and jazz to soul and even heavy metal. Yet many beginners find themselves quickly overwhelmed, uncertain how to capture that authentic blues feel.

If this sounds familiar, don’t worry: every guitarist, even legends like Eric Clapton or Stevie Ray Vaughan, started exactly where you are right now. Let’s unravel the blues step by step, taking the mystery out of what makes this music timeless.

Where Did the Blues Really Come From?

The blues originated among workers in the cotton fields of the Mississippi Delta shortly after slavery ended. Early blues artists like Robert Johnson and Blind Lemon Jefferson traveled from town to town, sharing their soulful, acoustic guitar style. Their simple yet emotive songs laid the groundwork for generations of musicians.

As industrialization shifted workers northward in search of better opportunities, the blues naturally moved with them. Chicago became a significant musical hotspot in the late 1940s, giving birth to electric blues. Musicians like Muddy Waters and Howlin’ Wolf electrified the traditional acoustic blues, creating the distinctive Chicago Blues sound characterized by amplified guitars, harmonicas, and raw emotion.

Interestingly, this very American art form found fresh life overseas during the British blues boom in the 1960s. Artists like Jimmy Page and Jeff Beck reinterpreted American blues classics, ironically inspiring American musicians to revisit their own roots. The cycle of musical influence turned full circle, sparking entire new genres like psychedelic rock and heavy metal.

Getting Down to Basics: Chords, Structure, and Rhythm

When learning how to play Blues music on guitar, beginners should first focus on understanding the fundamental structure. Most blues songs follow a clear, repeating pattern known as the 12-bar blues. This structure revolves around three essential chords: the root (I), the fourth (IV), and the fifth (V). To give you a practical example, think of classic songs like The Thrill Is Gone by B.B. King or Hoochie Coochie Man by Muddy Waters, which are perfect demonstrations of this chord progression.

A common mistake beginners make is rushing through chord changes without mastering the rhythm. Blues rhythm has a distinct triplet feel, where beats are divided into groups of three rather than the typical two or four. This subtle rhythmic distinction creates the “shuffle” feel characteristic of authentic blues music.

Tip for Beginners: Spend time practicing rhythmic patterns slowly, counting “one-trip-let, two-trip-let” aloud. Don’t be afraid of simplicity at first, solid rhythm foundations will carry you further than complicated solos.

Essential Techniques Every Blues Guitarist Should Know

Beyond chords and rhythm, certain techniques define the blues guitar style. String bending is perhaps the most recognizable; it allows guitarists to express emotion in ways similar to the human voice. When practicing bends, beginners often struggle with pitch accuracy, so always double-check by matching your bends to a fretted target note.

Other essential blues techniques include:

  • Hammer-ons and pull-offs: These give your playing smoothness, helping you move between notes without excessive picking.
  • Slides and vibrato: These add emotional depth and character to your playing.
  • Palm muting and ghost notes: Crucial for developing dynamic rhythm playing, preventing monotonous or overly loud strumming.
  • Using a capo: This tool shifts the guitar’s open strings to different keys, offering creative flexibility helpful if you’re struggling to play certain chord shapes.

Avoiding Common Pitfalls

Beginners frequently overuse complex techniques too soon, causing frustration and inconsistency. Remember, simplicity can be your friend. Great blues often revolves around minimal notes played with intention. Take it slow, master basic techniques first, and gradually introduce complexity.

Ready to Start Playing the Blues?

Exploring how to play Blues music on guitar takes patience and consistent practice, but understanding these basics puts you firmly on the right path. Now it’s your turn: grab your guitar, revisit a few classics, and immerse yourself in one of the richest musical traditions around.

introduction to folk guitar by julien bitoun

How to Play Folk Music on Guitar: A Beginner’s Guide

Getting Started: It’s More than Just Strumming

Learning how to play folk music on guitar is about capturing a sound that’s both timeless and personal. While it might seem as simple as picking up an acoustic guitar and strumming along, genuine folk playing involves mastering a set of foundational skills that beginners often overlook. It’s common to see new guitarists dive straight into strumming chords without paying attention to rhythmic precision or chord clarity, resulting in a sound that’s muddy or uneven. But with the right approach, these hurdles quickly become manageable.

Before we dig into practical techniques, it helps to understand where folk guitar came from. Originally, folk songs were passed down orally, with each performer adapting melodies and lyrics to their style. Artists like Lead Belly in the early 20th century, and later Bob Dylan and Joan Baez in the 1960s, made folk a staple of modern music. Their influence remains powerful, shaping the styles of contemporary singer-songwriters from Ed Sheeran to Taylor Swift.

Essential Techniques for Authentic Folk Guitar Playing

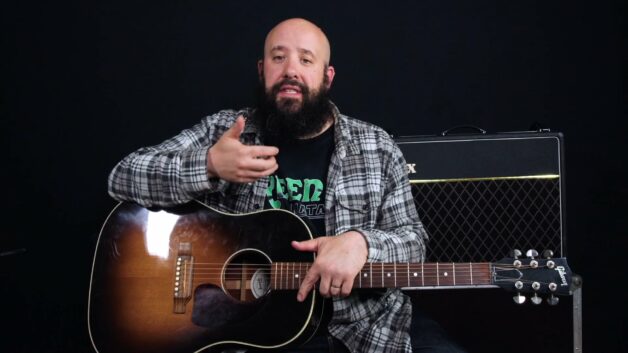
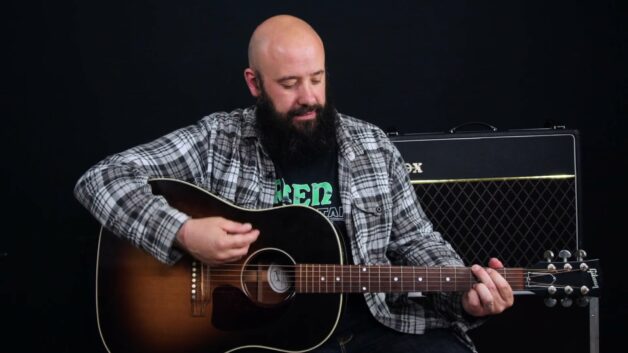
When you start your journey of learning how to play folk music on guitar, choosing the right instrument matters. A flat-top acoustic guitar with steel strings, such as a Martin Dreadnought or a Gibson J-45, is ideal. These guitars produce a deeper resonance, complementing your voice and offering a balanced, warm tone typical in folk genres. Nylon strings, often favored by classical guitarists, generally won’t achieve the crispness required for folk, though beginners sometimes mistakenly choose them because they’re softer on the fingers.

Speaking of fingers, finger discomfort is one of the earliest and most common challenges beginners encounter. Building calluses takes patience, so short, regular practice sessions will be more beneficial than occasional lengthy ones.

Strumming consistently is another skill new guitarists struggle with. Many beginners either hesitate between chords or interrupt their rhythmic flow because they’re too focused on finger placement. A helpful tip here is to maintain a steady up-and-down motion even when switching chords. Over time, muscle memory develops, and you’ll naturally place your fingers faster and with less effort.

Open chords, commonly known as cowboy chords, form the backbone of folk guitar. Chords like G major, C major, D major, and A minor are essential, as their open strings offer a bright, resonant quality. Don’t underestimate the value of these basic chords. Songs such as “Knockin’ on Heaven’s Door” by Bob Dylan or Tom Petty’s “Free Fallin’” rely heavily on them. Mastering these foundational chords gives you access to hundreds, if not thousands, of classic folk and pop songs.

Common Pitfalls and Teaching Tips for Folk Guitar Beginners

One frequent mistake beginners make is neglecting their vocal pitch when playing guitar. Even seasoned players occasionally discover that a song feels awkward in their vocal range. A simple but effective solution is to use a capo. Beginners often undervalue this accessory, but it’s a staple for adjusting songs to your voice without complex chord changes.

Another teaching tip: practice strumming patterns separately before adding chords. Many students attempt to combine both too early, creating unnecessary frustration. Try isolating your rhythm hand first; tap rhythms on your guitar without fretting chords. This method builds rhythmic confidence and clarity before combining both hands.

Key Takeaways to Remember:

  • Choose the right guitar: flat-top acoustic with steel strings.
  • Master open chords: especially G, C, D, and A minor.
  • Prioritize rhythmic consistency: steady strumming beats chord complexity.
  • Use a capo: to match vocal ranges comfortably.

Learning how to play folk music on guitar is rewarding precisely because it blends simplicity with subtlety. Keep your practice focused yet flexible, and you’ll soon discover your unique voice within this rich musical tradition.

wah-wah effect by julien bitoun

Unlocking the Wah-Wah Guitar Sound and Effect

Key Takeaways:

  • The wah-wah pedal dynamically alters mid frequencies, creating its signature expressive sound.
  • First popularized by Jimi Hendrix, the wah effect remains a staple in rock, funk, and metal music.
  • Modern guitarists use the wah both dynamically and in a fixed position for tonal shaping.
  • Understanding how to manipulate the wah pedal enhances expression and articulation in playing.

The Wah-Wah Effect: A Sound That Shaped Legends

The wah-wah pedal isn’t just another effects unit, it’s a defining element of electric guitar history. Its unmistakable vocal-like sweep has shaped countless songs, from psychedelic rock to modern metal. Originally introduced in the 1960s, it quickly became a secret weapon for guitarists looking to add extra character to their playing.

Jimi Hendrix didn’t invent the wah, but he certainly cemented its place in rock history. Tracks like Voodoo Child (Slight Return) showcase its powerful, dynamic range. Funk legends like Bootsy Collins and Eddie Hazel took the effect in a different direction, using it for rhythmic, percussive textures. Fast-forward to today, and bands like Metallica still rely on the wah for searing lead tones and expressive phrasing.

How the Wah-Wah Pedal Works (And Why It Sounds So Unique)

At its core, the wah pedal is a mid-frequency filter sweep. When you push it forward, you emphasize the higher mids, creating a sharp, cutting sound. Pull it back, and you roll off those frequencies for a darker, bass-heavy tone. This sweeping motion mimics the way a human voice shifts vowels, hence the “wah” sound.

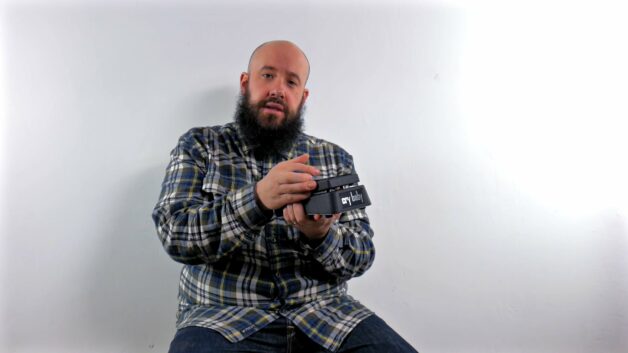
Unlike an EQ pedal, which allows for static adjustments, the wah is dynamic: you control it in real-time with your foot. The classic Crybaby and Vox wahs operate with a fixed Q factor and boost level, meaning you’re primarily shifting the midrange focus rather than altering the intensity of the effect. This is why some guitarists, like Michael Schenker, use it in a “cocked” position, keeping it still to boost a specific frequency range.

Mastering the Wah: Tips for Better Control

Many beginners struggle with timing their wah sweeps. One common mistake is overusing the effect without considering how it fits rhythmically into a phrase. To avoid this:

  • Match your wah movement with your picking dynamics. If your strumming is choppy, keep the wah movement sharp and deliberate. For smooth legato lines, go for slower sweeps.
  • Experiment with “half-wah” positions. Not every note needs a full frequency sweep. Sometimes, leaving the pedal slightly tilted forward creates a more subtle emphasis.
  • Practice with clean and distorted tones. A wah pedal reacts differently depending on your signal chain. High-gain settings can exaggerate the effect, while clean tones reveal its full frequency response.

Avoiding Common Wah-Wah Mistakes

It’s easy to go overboard with the wah, especially in high-gain settings where it can muddy your mix. If your leads sound lost, check these factors:

  • Are you using too much gain? Wah pedals work best when your core tone isn’t already oversaturated.
  • Is your wah before or after distortion? Placement matters: most guitarists put it before distortion for a more natural sweep, but some prefer post-distortion for a more pronounced effect.
  • Are you using it sparingly? The best wah solos don’t rely on constant movement; they use the effect as a tool to highlight specific notes.

Finding Your Signature Wah-Wah Sound

Every guitarist has a different approach to the wah pedal. Some use it for dramatic, sweeping lead lines, while others keep it fixed for midrange-focused riffs. The best way to master it? Listen to the greats: Hendrix, Clapton (White Room), Slash (Sweet Child O’ Mine intro solo), and even Tom Morello (Bulls on Parade) and analyze how they integrate the effect.

The wah-wah isn’t just about making cool sounds; it’s about enhancing your playing dynamics. The more control you have, the more expressive your solos and riffs will become. Try different settings, practice in various musical contexts, and soon enough, the wah pedal will feel like an extension of your playing rather than just another effect in your rig.

whammy effect by julien bitoun

Whammy Guitar Sound and Effect: Elevate Your Playing

Key Takeaways

  • The Whammy pedal is an essential tool for pitch-shifting effects, used by guitarists like Tom Morello and Dimebag Darrell.
  • It allows real-time control over pitch, shifting notes up or down for dramatic sonic effects.
  • Common uses include two-octave pitch bends, dive bombs, and harmony layering.
  • Some versions, like the Whammy DT, also offer drop-tuning capabilities.

The Whammy Pedal, More Than Just an Effect

Not all effects just color your tone. Some redefine how you play. The Whammy pedal, introduced by Digitech in the early ‘90s, falls into the latter category. Unlike distortion or delay, which alter the texture of your sound, the Whammy transforms pitch dynamically, adding an expressive dimension that’s impossible to replicate manually.

Many first encounter the Whammy through legendary players like Tom Morello (Rage Against the Machine) or Dimebag Darrell (Pantera), but its influence extends far beyond heavy rock and metal. From Radiohead’s Jonny Greenwood to Jack White, this pedal has shaped countless genres, proving that creative pitch shifting is more than just a gimmick. It’s an art form.

How the Whammy Pedal Works

At its core, the Whammy digitally alters pitch in real-time, allowing you to glide between notes using a treadle (like a wah pedal, but with pitch instead of tone). The pedal offers multiple settings, but a few stand out as the most widely used.

Octave Shifts and Dive Bombs: Classic Whammy Sounds

One of the most iconic Whammy settings is the two-octave up shift. This effect gives a guitar an almost synth-like, soaring quality, famously heard in solos and intros across rock and metal. For beginners, this can feel unnatural at first: your fingers play one note, but the sound coming out is something completely different. The key? Controlled foot movement. Pushing the treadle all the way down takes your note up two octaves, while rocking it back smoothly transitions between the natural and modified pitches.

Another staple use is the dive bomb effect. Traditionally, this requires a Floyd Rose tremolo, but the Whammy offers a digital alternative. With the pitch set to drop one or two octaves, you can emulate those dramatic, plunging notes often heard in Van Halen or Pantera riffs without needing a floating bridge setup. However, it’s important to note that timing is everything; a poorly controlled dive bomb can quickly turn into an unintelligible rumble.

Harmony Mode: Thickening Up Your Sound

Beyond simple pitch shifting, the Whammy also features a harmony mode, which blends your original note with a pitch-shifted counterpart. This is particularly useful for recreating the sound of dual-guitar harmonies in a single performance. Think of bands like Thin Lizzy or the layered guitar work of Brian May in Queen. Instead of recording multiple parts, you can achieve a similar effect with just one guitar.

This setting isn’t just for lead players, either. Rhythm guitarists can use subtle harmonization to thicken up power chords or add movement to simple riffs. A common trick is setting the Whammy to a perfect fifth or major third to create fuller, more orchestral voicings. Just be mindful of overuse: too much harmony can clutter your mix, especially in a live setting.

Drop Tuning: A Secret Weapon for Versatility

Certain Whammy models, like the Whammy DT, take things a step further by including a drop-tuning function. With this feature, you can lower your guitar’s tuning electronically without changing string tension which is ideal for players who frequently switch between standard and lower tunings but don’t want to carry multiple guitars.

For example, if you need to shift from standard tuning to Drop D, the Whammy DT allows you to do so instantly with a single foot tap. This is particularly useful in live performances, where tuning changes can be time-consuming. Additionally, you can go even further simulating the deep resonance of a baritone guitar or even mimicking a bass.

That said, one limitation to keep in mind is latency. While the Whammy DT does a solid job at recreating lower tunings, extreme settings (like dropping a full octave) may introduce slight tracking delays. For best results, it’s recommended to use drop-tuning conservatively or combine it with additional EQ adjustments to maintain clarity.

Mastering the Whammy: Essential Tips for Beginners

If you’re new to the Whammy pedal, it can feel tricky at first, especially since it requires both foot coordination and precise timing. Here are a few quick tips to help you get started:

  • Start Slow: Practice transitioning between notes at a controlled pace. Rushing the effect can sound unnatural.
  • Use It Sparingly: While fun, overusing pitch shifts can make your playing sound artificial.
  • Combine with Other Effects: The Whammy pairs well with delay and reverb for an ambient feel or distortion for aggressive, cutting tones.
  • Experiment with Expression: Unlike static effects, the Whammy responds dynamically to how you move the treadle. Use this to add subtle nuances to your playing.

The Whammy in Your Rig: Is It Right for You?

So, should you add a Whammy pedal to your setup? If you’re into creative pitch manipulation, expressive solos, or thick harmonies, then absolutely. But if your style leans more toward traditional, unprocessed guitar tones, it might not be a necessity. That said, even blues and classic rock players have found inventive ways to incorporate the Whammy, so don’t rule it out based on genre alone.

At the end of the day, the Whammy pedal isn’t just about changing pitch, it’s about expanding what’s possible on the guitar. Whether you’re channeling Morello’s radical pitch bends, Dimebag’s dive bombs, or just looking for a unique twist to your sound, this pedal offers a world of sonic exploration at your feet.

Understanding Compression in Guitar Sound and Effect

Key Takeaways:

  • Compression evens out your dynamic range, making your playing more consistent.
  • It enhances sustain, attack, and overall tone control.
  • Essential for funk, country, and slide guitar, but useful in many styles.
  • Learning to set up a compressor pedal correctly is key to making the most of this effect.

What is Compression in Guitar Sound?

If you’ve ever wondered why some guitar tones sound polished and controlled while others feel uneven, the answer often lies in compression. This effect has its roots in the recording studio, where engineers have long used it to balance out levels in a mix. Over time, guitarists realized its potential for live playing, and it became a staple effect across various genres.

At its core, a compressor reduces the dynamic range of your sound, meaning it levels out volume fluctuations. Loud peaks get softened, while quieter notes get a boost. The result? A smooth, consistent tone that feels easier to control, especially in rhythm playing or intricate lead work. For styles like funk, compression tightens up percussive strumming. In country, it adds that signature snap to chicken-picking. And for slide guitar, it evens out naturally inconsistent dynamics, making phrases sound more fluid.

Getting the Most Out of Your Compressor Pedal

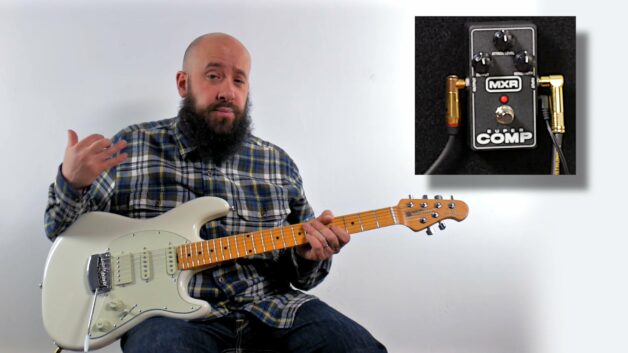
Understanding how to tweak a compressor pedal is crucial: too little compression, and you might not notice a difference; too much, and your tone can feel lifeless. Most pedals have three main controls:

  • Output Level: Adjusts the final volume after compression (important because compression naturally lowers output).
  • Attack: Dictates how much of your initial pick attack is preserved before compression kicks in.
  • Sensitivity (or Sustain): Controls how aggressively the compressor evens out your playing.

For beginners, it’s easy to set everything too high and end up with an overly squashed sound. Instead, start with moderate settings. A low sensitivity for subtle dynamic control, a medium attack to retain articulation, and an output level that compensates for any volume loss. From there, tweak based on your playing style.

Compression in Action: When and How to Use It

Compression is one of those effects that’s easier to feel than to hear. Unlike distortion or reverb, which drastically alter your tone, compression works behind the scenes, shaping how notes respond under your fingers. This is why some players struggle to hear its impact at first. The best way to grasp it is by experimenting.

Try this exercise: play a clean rhythm part with and without compression. Listen to how sustained notes hold longer and how softer strums sound more present. Next, try playing lead lines. Notice how compression helps notes sing out, almost like natural sustain.

Some classic tones rely heavily on compression. Think of Nile Rodgers’ percussive funk strumming or the way Mark Knopfler’s fingerpicking sounds fluid and controlled. Even in high-gain settings, a touch of compression can tighten up palm-muted riffs and solos.

Common Mistakes to Avoid

While compression is a powerful tool, it’s easy to overdo it. Here are some pitfalls to watch out for:

  • Setting the sensitivity too high: This can kill dynamics and make your playing sound unnatural.
  • Neglecting the output level: A compressor lowers volume, so you need to compensate.
  • Using it in the wrong place in your signal chain: Typically, a compressor works best before overdrive and modulation effects, though some players prefer it post-drive for a smoother touch.

Final Thoughts: Mastering Compression for Your Playing

Compression might not be the most obvious effect, but once you learn how to use it properly, it becomes an invaluable tool in your setup. Whether you want a subtle enhancement or a heavily compressed tone for a specific style, understanding the settings and experimenting with different approaches will help you unlock new dimensions in your playing.

Take the time to tweak your compressor pedal, and you’ll quickly see why so many professional guitarists rely on this often-underestimated effect.