metal distortion effect by julien bitoun

Mastering Distortion Guitar Sound and Effect in Metal

Key Takeaways:

  • Distortion pedals are essential for achieving the heavy, aggressive tones of metal.
  • Many high-gain pedals replicate classic Mesa Boogie Dual Rectifier and Marshall JCM800 amp sounds.
  • EQ and frequency adjustments allow for detailed tone shaping, with a special focus on mids.
  • Noise gates help control unwanted feedback and hiss in high-gain settings.
  • Mid-scooping can be risky: great for heavy tones but problematic in a band mix.

Understanding Metal Distortion: How to Get That Crushing Tone

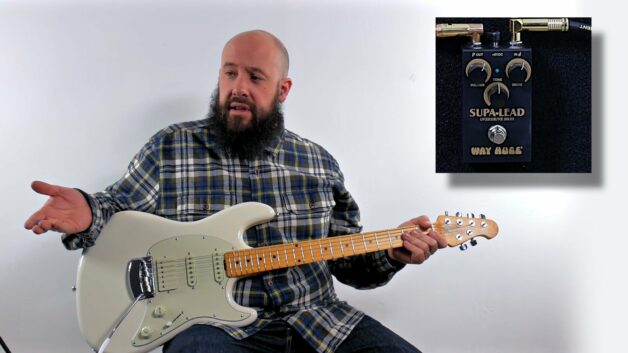
Distortion has been the defining sound of metal guitar since the early days of bands like Black Sabbath and Judas Priest. Whether you’re after a tight, percussive rhythm tone or a screaming lead, the right distortion pedal will help you shape your sound. Most metal distortion pedals aim to replicate the high-gain saturation of famous amps like the Mesa Boogie Dual Rectifier, Marshall JCM800, or even more modern monsters like the Diezel VH4.

A gain knob is the heart of any distortion pedal, determining how much saturation and compression you apply to your signal. On a high-gain pedal, even the lowest settings still deliver considerable drive. While this might sound great on its own, excessive gain can muddy your sound, especially in a full-band setting.

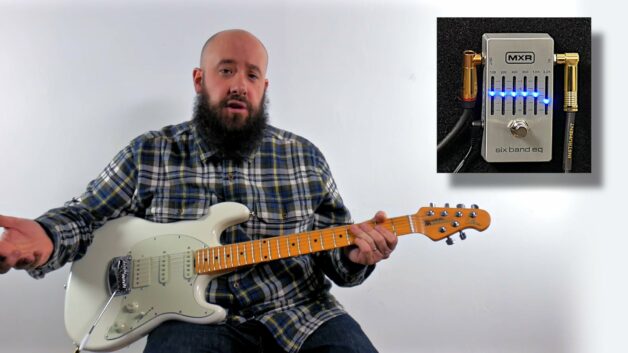
Shaping Your Sound: EQ and Frequency Tweaks

To fine-tune your distortion tone, most metal pedals offer a three-band EQ:

  • Low (Bass): Adds thickness and low-end punch.
  • Mid (Mids): Defines the core tonal character. Cutting too much can make your sound disappear in a mix.
  • High (Treble): Enhances clarity and attack.

A crucial but often misunderstood control is the frequency knob, found on more advanced pedals. This functions as a semi-parametric EQ, letting you adjust which mid frequencies to boost or cut. Dialing in the right frequency range helps you stand out, especially for solos or lead playing.

Many metal players love the mid-scoop feature, which drastically reduces mid frequencies for an ultra-heavy, modern sound. While this works well for certain styles it can be problematic in a live mix. If your guitar sounds amazing at home but gets lost with a full band, your mids are likely too scooped.

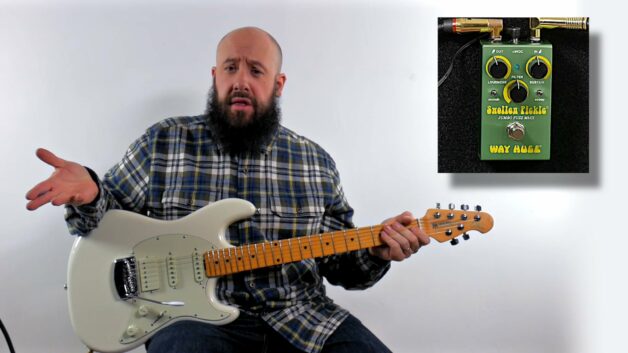
Dealing with Noise: The Importance of a Noise Gate

One of the biggest challenges with high-gain distortion is unwanted noise. The more gain you add, the more you amplify background hum, pickup interference, and unwanted feedback. This is why many distortion pedals include a built-in noise gate, which helps cut out unwanted hiss and ensures a tighter, more controlled sound.

A noise gate is particularly useful when playing staccato riffs or chugging rhythms, where clean stops and starts are key. If you’ve ever wondered why your favorite metal guitarist’s tone sounds so crisp and defined, a well-set noise gate is often part of the equation. However, setting it too aggressively can cut off sustain and make your playing feel unnatural. So always find a balance.

Common Mistakes and Pro Tips for Metal Guitarists

Even with a great distortion pedal, it’s easy to fall into common tone mistakes that can make your sound too muddy, harsh, or weak in a mix. Here are some key points to keep in mind:

  • Avoid cranking the gain too high: it might sound impressive alone but can turn into an indistinct blur in a mix.
  • Experiment with mids rather than blindly scooping them. A slight mid boost can make leads more articulate and help rhythms cut through.
  • Match your pedal to your amp: some pedals work better with solid-state amps, while others are designed to push tube amps into further saturation.
  • Try different pickup positions: bridge pickups usually work best for tight, aggressive rhythms, while neck pickups can add warmth for solos.

Dial in Your Distortion Tone Like a Pro

Mastering distortion guitar sound and effect in metal is a mix of technical understanding and personal experimentation. Start with neutral settings and gradually tweak your EQ, gain, and frequency controls to find your unique sound. Pay attention to how your tone interacts with other instruments in a mix, whether recording or playing live. A great distortion tone is more than just gain, it’s about clarity, balance, and control. Now, grab your pedal, start tweaking, and unleash your metal tone!

rock distortion effect by julien bitoun

Understanding Distortion Guitar Sound and Effect in Rock

Key Takeaways

  • Distortion is central to rock guitar, from classic crunch to high-gain saturation.
  • The Way Huge Super Lead emulates the legendary Marshall Plexi amp tone.
  • Volume, gain, and tone work together to refine distortion and achieve balance.
  • Adjusting gain settings shapes your sound, from subtle warmth to aggressive bite.
  • Tone control affects brightness and clarity, crucial for fitting into a mix.

The Sound That Defined Rock: What Makes Distortion Essential?

Rock guitar wouldn’t be the same without distortion. From the raw grit of early blues-rock to the full-throttle gain of modern metal, distorted guitar has shaped the sound of entire genres. Think of Jimi Hendrix’s searing fuzz tones, the biting crunch of AC/DC’s power chords, or the high-gain wall of sound from Metallica’s rhythm guitars.

But distortion isn’t just about cranking everything to the max. It’s about control, balance, and knowing how to dial in the right amount for your style. This is where pedals like the Way Huge Super Lead come in, offering a range of tones inspired by classic Marshall amps.

Breaking Down the Controls: Volume, Gain, and Tone

Most distortion pedals, especially overdrive and amp simulators, are built around three fundamental controls.

  • Volume: Controls the overall loudness. A common mistake beginners make is leaving this too low, which can make distortion sound weak. On the flip side, maxing it out can overpower your amp’s natural dynamics.
  • Gain (Drive): This determines how much distortion is applied. Lower gain settings offer a light crunch, reminiscent of an old Rolling Stones riff. Higher settings push into heavy saturation, ideal for Iron Maiden or Van Halen-style solos.
  • Tone: Acts like an EQ filter, shaping the overall brightness or darkness. Lower settings can sound too muddy, while cranking it up can make your sound too sharp and thin. The key is finding a balance that cuts through the mix without being harsh.

Dialing in Your Distortion: Tips for the Best Sound

A common challenge for beginners is getting a distortion sound that isn’t too harsh or too muddy. Many new players either crank the gain to unrealistic levels or set everything to noon without fine-tuning. Here’s how to avoid these pitfalls and dial in a great tone:

  1. Start with all settings at noon (12 o’clock) as a neutral starting point.
  2. Adjust gain first: too little and your tone lacks power, too much and you lose clarity.
  3. Use volume to compensate: a high gain setting might require reducing volume to avoid overpowering your mix.
  4. Fine-tune the tone knob: if your sound feels too piercing, roll back the treble slightly.

The Art of Balancing Your Tone

One of the biggest myths about distortion is that more gain equals better tone. In reality, too much gain can kill your dynamics, making your playing sound muddy and lifeless. Many pro guitarists actually use less gain than you’d expect, relying on technique and amp settings to shape their sound. Listen to Angus Young’s tone in “Back in Black”. It’s crunchy but not overly saturated, allowing every note to ring out with clarity.

A great way to experiment is by playing the same riff with different gain levels. Start with a low-gain crunch (think The Who’s “Won’t Get Fooled Again”) and gradually push it into full distortion territory (Nirvana’s “Smells Like Teen Spirit”). This will help you develop an ear for the subtle differences between overdrive, distortion, and fuzz.

Shaping Your Sound: Finding the Perfect Distortion

Every guitarist has a unique approach to distortion, and there’s no single “right” setting. The best way to find your tone is to experiment, listen, and adjust. Whether you’re going for a bluesy crunch, a hard rock edge, or a metal growl, understanding how distortion interacts with your guitar and amp is key.

Final Pro Tip: Record yourself playing with different settings. What sounds good in a bedroom might be completely different in a band mix. Learning to tweak your distortion for different environments is a crucial skill for any guitarist looking to refine their tone.

big muff fuzz effect by julien bitoun

The Big Muff Fuzz Guitar Sound and Effect: A Timeless Classic

Key Takeaways:

  • The Big Muff is a legendary fuzz pedal that has shaped the sound of countless rock and alternative tracks.
  • It delivers a thick, sustained distortion with a signature mid-range scoop, making it a favorite among guitarists.
  • Many variations exist, each adding unique tonal tweaks while staying true to the Big Muff circuit.
  • Proper use of the pedal’s controls (volume, sustain, and tone) can make or break your sound.
  • Understanding the scoop and crunch switches helps you adapt your tone for different playing environments.

A Fuzz Pedal That Redefined Rock Guitar

The Big Muff fuzz guitar sound is instantly recognizable. Introduced by Electro-Harmonix in the early 1970s, this pedal quickly became a go-to for musicians looking for rich sustain and harmonically complex distortion. Unlike the Fuzz Face, which responds dynamically to picking attack, the Big Muff provides a more compressed, even sustain, making it ideal for soaring leads and thick rhythm tones.

You’ll find this effect on classic records by Pink Floyd, Smashing Pumpkins, and Dinosaur Jr., proving its versatility across decades. From David Gilmour’s smooth sustain on Comfortably Numb to Billy Corgan’s wall-of-sound fuzz on Siamese Dream, the Big Muff circuit has been at the heart of many iconic tones.

But while it’s a favorite among seasoned players, beginners often struggle to dial in a balanced sound, especially in a band mix.

Dialing In Your Big Muff Tone: The Essentials

To get the most out of your Big Muff fuzz guitar sound, it’s crucial to understand its controls:

  • Volume (Loudness): Controls the overall output level. Many players set this higher than expected, as the pedal can introduce a perceived drop in presence.
  • Sustain (Gain): Determines how much fuzz and sustain are added. At lower settings, it can still sound quite distorted. Don’t expect a subtle breakup.
  • Filter (Tone): Works like a tone knob, shaping the overall brightness or darkness of the sound. Dialing it down results in a heavier, bass-rich fuzz, while turning it up gives a sharper, cutting tone.

Many modern versions introduce additional switches for extra tonal control:

  • Scoop Switch: Adjusts the midrange response. A scooped midrange gives the pedal its classic character but can make it harder to cut through a mix.
  • Crunch Switch: Alters the distortion texture, sometimes adding extra bite or a volume boost.

If you find that your Big Muff tone is disappearing in a band mix, consider adding a midrange boost through an EQ pedal or adjusting your amp’s settings. This is a common issue, especially for players using it in a live setting.

Common Mistakes and How to Avoid Them

A common pitfall with the Big Muff is cranking every knob to the max. While it might seem like the best way to get the fullest fuzz tone, it often leads to a muddy, indistinct sound. Instead, start with moderate settings and adjust based on your playing context.

Another mistake is ignoring the interaction between the pedal and your amp. The Big Muff pairs best with clean or slightly overdriven amps. Plugging it into an already distorted amp can sometimes make it sound undefined or overly compressed. If you’re using it with a high-gain amp, consider rolling back the sustain and adjusting your filter settings to maintain clarity.

Using the Big Muff in Different Musical Contexts

While many associate the Big Muff fuzz guitar sound with classic rock and grunge, it’s also widely used in shoegaze, doom metal, and even modern indie music. For example:

  • Lead solos: David Gilmour used it to add singing sustain to his leads.
  • Rhythm playing: Bands like The Smashing Pumpkins stacked multiple layers of fuzz for a thick, textured sound.
  • Experimental sounds: Shoegaze guitarists often run it through reverb and delay for a dreamy, atmospheric tone.

Experimentation is key. Stacking a Big Muff with other pedals (like a clean boost or an overdrive) can help shape its tone in unexpected and useful ways.

Final Thoughts

The Big Muff fuzz guitar sound is one of the most influential effects in rock history. Learning how to control its tone, avoid common pitfalls, and integrate it effectively into your setup will help you get the best results. Whether you’re looking for a classic vintage fuzz or something more modern and aggressive, the Big Muff offers a world of sonic possibilities.

fuzz face effect by julien bitoun

Mastering the Fuzz Face Guitar Sound and Effect

Key Takeaways

  • The Fuzz Face is a legendary effect pedal that helped shape rock and blues guitar tones.
  • Two main versions exist: silicon (aggressive, high gain) and germanium (warmer, more dynamic response).
  • Works differently depending on whether your amp is clean or already distorted.
  • Adjusting your guitar’s volume and tone knobs drastically changes the fuzz response.
  • Proper placement in the effects chain enhances its performance.

The Fuzz Face: A Sound That Defined Generations

Few effects are as instantly recognizable as the Fuzz Face guitar sound and effect. Since its introduction in the 1960s in Britain, this simple yet powerful pedal has found its way onto countless recordings. Used by legends like Jimi Hendrix, David Gilmour, and Eric Johnson, the Fuzz Face is known for its raw, woolly distortion and expressive dynamic control.

Unlike modern high-gain distortion pedals, which deliver consistent saturation, the Fuzz Face interacts directly with your playing style. Your picking intensity, volume knob settings, and amp choice all influence its final sound. This level of responsiveness makes it a favorite among guitarists who love organic, touch-sensitive tones.

The Science of Fuzz: Silicon vs. Germanium

Not all Fuzz Faces sound the same. The original models were built with germanium transistors, which produce a slightly softer, warmer, and more bass-heavy tone. They also tend to be more sensitive to temperature changes, a detail that has frustrated guitarists playing outdoor gigs. Later versions introduced silicon transistors, which are more stable and deliver a sharper, more aggressive fuzz with higher gain.

If you’ve ever wondered why some Fuzz Faces sound smoother while others are biting and edgy, the transistor type is a big factor. Many players own both types to match different musical styles: germanium for vintage blues and classic rock, silicon for harder rock and psychedelic tones.

Dialing in the Perfect Fuzz Sound

With only two knobs (Volume and Fuzz) this pedal might seem simple, but don’t be fooled. Finding the right settings takes some experimentation.

  • Volume: Controls output level. If you’re using a clean amp, be careful not to push it too hard. On an overdriven amp, increasing volume can help blend the fuzz seamlessly with the amp’s natural breakup.
  • Fuzz: This is actually a gain control, not just a distortion level. Set it low for a spitty, almost broken-speaker effect, or max it out for the classic, thick fuzz tones heard on records like “Purple Haze”.

A common mistake is maxing out the Fuzz control immediately. Start lower and listen to how it interacts with your guitar’s tone before cranking it all the way.

Your Guitar’s Volume Knob: The Secret Weapon

One of the defining features of the Fuzz Face guitar sound and effect is how well it responds to your guitar’s volume knob. Unlike many distortion pedals that sound weak when you roll back the volume, the Fuzz Face cleans up beautifully, producing a sparkling, lightly overdriven sound reminiscent of a cranked vintage amp.

Try this trick:

  1. Set your Fuzz Face to full gain.
  2. Play with your guitar’s volume knob around 6 or 7.
  3. Notice how the fuzz fades into a rich, dynamic overdrive.
  4. Roll the volume back up for full-on saturation when needed.

This technique is why many guitarists use the Fuzz Face as a dynamic tool, rather than just a static effect.

Common Mistakes and Best Practices

Fuzz can be tricky. Many beginners struggle with getting the right sound because they make these common mistakes:

  • Using the wrong amp settings: A mid-scooped clean tone (often found on modern amps) doesn’t pair well with fuzz. Try a warm, midrange-heavy amp setting instead.
  • Placing it too far down the pedal chain: The Fuzz Face works best first in the signal chain, before buffers or wah pedals. Placing it after other effects can kill its unique interaction with your guitar.
  • Expecting high clarity: Fuzz is not distortion. It’s messy, unpredictable, and woolly. If you want definition, try stacking it with a boost or overdrive.

Unlocking the Full Potential of the Fuzz Face

If you’re new to fuzz, start by playing simple riffs with different settings. Try replicating the tones in songs like “Sunshine of Your Love” (Cream) or “Time” (Pink Floyd) to hear the difference in fuzz textures. Also, don’t be afraid to experiment with your guitar’s tone knob. Cutting treble can create a thick, almost synth-like fuzz sound.

Mastering the Fuzz Face guitar sound and effect takes time, but once you understand how it interacts with your playing, it becomes an essential part of your tonal toolkit. Whether you’re chasing vintage rock tones or pushing the boundaries of experimental fuzz, this pedal remains one of the most expressive tools a guitarist can use.

reverb effect by julien bitoun

Understanding Reverb Guitar Sound and Effect

Key Takeaways:

  • Reverb enhances guitar sound by simulating different acoustic spaces, from small rooms to vast halls.
  • Various types of reverb, such as plate, spring, room, epic, modulated, and pad, each have distinct characteristics suited to different styles.
  • Key controls like tone, decay, and mix determine the depth and presence of reverb in your playing.
  • Reverb settings can be subtle or extreme, from slight ambiance to fully immersive, experimental soundscapes.

What is Reverb and Why It Matters for Guitarists?

Reverb is one of the most fundamental effects in a guitarist’s toolkit. It adds depth, making notes sound fuller and more natural. Whether you’re playing in a small practice room or a large venue, reverb gives your tone a sense of space. In fact, it’s been a staple of recorded music for decades. Just listen to the surf rock tones of The Ventures or the cavernous sound of post-punk bands like The Cure.

Many amps come with built-in reverb, but dedicated reverb pedals provide greater flexibility. Some guitarists prefer a light touch, while others go for deep, atmospheric effects that completely transform their sound. Understanding the different types of reverb will help you find what works best for your style.

Exploring Different Reverb Types

Each reverb type brings a unique character to your tone. Here’s a breakdown:

  • Plate Reverb: Inspired by the large metal plates used in studio recording during the 60s and 70s, it produces a smooth, bright echo that works well for clean tones.
  • Spring Reverb: Found in many vintage Fender amps, this has a bouncy, metallic quality that’s great for surf rock, blues, and country.
  • Room Reverb: Simulates the natural acoustics of a small space, perfect for practicing or achieving a warm, intimate sound.
  • Epic Reverb: Expands the sound into a large, cathedral-like space, ideal for cinematic or ambient playing.
  • Modulated Reverb: Adds slight chorus-like variations, giving a dreamy, fluid character to your notes.
  • Pad Reverb: Produces long, synth-like textures, useful for ambient and experimental guitarists.

Some players stick to one type of reverb for consistency, while others mix different settings for a signature sound. A great example is David Gilmour of Pink Floyd, who used lush reverbs to create immersive soundscapes.

Adjusting Reverb Settings for the Best Tone

To get the most out of your reverb effect, learning how to fine-tune the controls is crucial. Even small adjustments can make a big difference.

  • Tone: Adjusts brightness. Lower settings result in a warmer, bass-heavy reverb, while higher settings create a sharper, more cutting effect.
  • Decay: Controls how long the reverb lasts. Shorter decay is best for rhythm playing, while longer settings add sustain and atmosphere.
  • Mix: Blends your dry signal with the reverb effect. Keeping it low retains clarity, while higher settings push the effect to the forefront.

Avoiding Common Reverb Mistakes

Many beginners make the mistake of overloading their sound with reverb, making their playing muddy and unclear. Here are a few things to watch out for:

  • Too much decay can drown out fast passages, making articulation difficult.
  • High mix levels can cause your original tone to get lost in the effect.
  • Pairing heavy reverb with distortion can create an unmanageable wash of sound. Try dialing it back for better definition.

A good rule of thumb: start with conservative settings, then gradually increase the effect to taste. If your tone starts to feel distant or unfocused, you’ve likely gone too far.

Get Started with Reverb and Elevate Your Playing

Whether you’re looking for a classic spring reverb to add vintage character or an ambient pad effect for experimental textures, reverb is an invaluable tool. Many legendary players, from Jimi Hendrix to Eric Johnson, have relied on reverb to shape their signature tones.

Experiment with different types and settings to find what fits your style. Try using a light room reverb for practicing, a spring reverb for blues solos, or an epic reverb for cinematic swells. The right reverb can bring new life to your playing, so start exploring and see where it takes you!

equalizer effect by julien bitoun

Mastering Guitar Sound and Effect: Understanding EQ for Better Tone

Key Takeaways

  • EQ (Equalization) is essential for shaping your guitar sound.
  • Different frequency ranges contribute to distinct tonal characteristics.
  • Adjusting EQ settings helps refine tone for different styles and settings.
  • Boosting mids enhances solos, while scooping them creates a heavier, metal-like tone.
  • Using an EQ pedal effectively can significantly impact your overall sound.

Understanding EQ and Its Role in Guitar Sound

Equalization (EQ) is one of the most powerful tools in a guitarist’s arsenal. While it’s often associated with mixing in a studio, EQ plays a crucial role in shaping tone even before you hit record.

At its core, EQ allows you to adjust specific frequency bands, boosting or cutting certain parts of the sound to achieve clarity, warmth, or punch. For guitarists, this means sculpting the sound to fit the mix, whether in a band setting or a solo performance.

How Frequency Ranges Affect Your Guitar Sound

Each part of the frequency spectrum plays a distinct role in defining your tone:

  • 20-200 Hz (Bass Range): This is where the deep, low-end frequencies reside. Too much bass can make your tone muddy, especially if playing with distortion.
  • 200 Hz – 2 kHz (Mid Range): The most crucial range for guitar. Mids define character, punch, and presence.
  • 2 kHz – 20 kHz (Treble Range): These frequencies add brightness and articulation. Too much can make your tone harsh.

Historically, many famous guitar tones rely heavily on the midrange. Think about how Eric Clapton’s “woman tone” stands out due to the carefully shaped mids, or how Metallica’s classic scooped-mid sound creates that heavy, aggressive punch.

Using EQ to Refine Your Tone

Knowing how to dial in your EQ can transform your playing experience. Here are a few essential techniques:

  • Boosting Mid-Range for Solos: Raising the 800 Hz – 1.6 kHz range ensures your lead lines cut through a dense mix. This is a common trick in live settings where rhythm guitars and bass can overwhelm lead parts.
  • Scooping Mids for a Heavier Sound: Lowering mids while boosting lows and highs results in the signature “metal” tone heard in bands like Pantera and Metallica.
  • Reducing Bass to Improve Clarity: Excess bass can make your tone sound undefined, particularly when using high-gain amps.
  • Taming High Frequencies: If your sound is too piercing, cutting frequencies above 5 kHz can help prevent listener fatigue, especially when playing through bright amplifiers like Fender Twins.

Common EQ Mistakes and How to Avoid Them

EQ isn’t just about boosting frequencies, sometimes the key is cutting unwanted ones. One of the most common beginner mistakes is over-EQing.

  • Boosting too many frequencies at once – This can make the sound overly processed and unnatural. Instead, focus on subtle changes (3-6 dB at most) to shape the tone.
  • Neglecting the midrange – While bass and treble are tempting to tweak, the mids carry the essence of your tone. Cutting them too much can leave your guitar buried in the mix.
  • Ignoring how EQ interacts with your amp and pedals – EQ adjustments should complement your existing gear, not fight against it. For example, if your amp naturally emphasizes mids, you might not need to boost them excessively with an EQ pedal.

Teaching Tip: How to Train Your Ears for EQ Adjustments

A great way to develop an ear for EQ is to experiment with isolated frequency boosts and cuts. Try this exercise:

  1. Play a clean chord progression (G-D-C works well) and slowly boost a single frequency band.
  2. Observe how it alters the tone.
  3. Then, cut that same frequency and note the difference.

This hands-on approach will help you internalize how each frequency range impacts your sound, making you more confident when shaping your tone in real-world situations.

Take Your Guitar Sound to the Next Level

EQ is more than just a pedal on your board, it’s a fundamental part of tone shaping. Whether you want to enhance solos, get a tight rhythm tone, or experiment with unique soundscapes, mastering EQ will unlock new dimensions in your playing.

Take the time to explore different settings, tweak your gear, and listen critically. A well-EQed tone can make the difference between getting lost in the mix or standing out with clarity and confidence.

delay effect by julien bitoun

Mastering Delay: Understanding the Delay Guitar Sound and Effect

Key Takeaways

  • Delay is a fundamental effect that shapes a guitar’s tone and depth.
  • Common controls include Mix, Regen, and Time, each influencing the delay’s intensity and repetition.
  • Analog delay offers a warm, natural sound, often preferred for its organic decay.
  • Modulation settings can replicate vintage tape echo characteristics.

What is Delay and Why Does It Matter?

Delay is one of the most versatile effects a guitarist can use. Whether you’re chasing the spacious soundscapes of David Gilmour or the rhythmic echoes of The Edge, understanding delay is key to unlocking new sonic possibilities. At its core, delay records your signal and plays it back after a short interval, creating a repeated echo that can be fine-tuned for different effects.

Beginners often struggle with setting delay properly. Learning how to dial in the right balance is crucial. The goal isn’t just to add repeats but to shape the space and rhythm of your playing.

The Essential Controls of a Delay Pedal

While modern delay pedals can be packed with features, most revolve around three fundamental controls:

  • Mix (or Level): Determines how much of the delayed signal is blended with the original sound. Set it too high, and your playing can get lost in the repeats.
  • Regen (or Feedback): Controls how many echoes you hear. A low setting provides a single repeat, while high feedback settings can create an endless loop, sometimes leading to self-oscillation.
  • Time (or Delay): Adjusts the spacing between the original note and its repeat. Short settings give a slapback effect, common in rockabilly and blues, while longer settings create ambient textures ideal for post-rock and atmospheric solos.

These three knobs define most delay pedals, from vintage analog units to high-tech digital models. While digital delay provides crystal-clear repetitions, analog delay pedals, like the MXR Carbon Copy, add warmth by subtly degrading each repeat, making them fade naturally into the mix.

The Appeal of Analog Delay And Its Limitations

Analog delay, favored by players like Eric Johnson, is known for its rich, organic sound. Unlike digital delay, which can produce ultra-precise repeats, analog circuits rely on bucket brigade devices (BBDs) that naturally roll off high frequencies with each repetition. This gives the effect a more musical, tape-like quality, but it also means analog delay is limited in length, most max out around 500-600 milliseconds.

If you’re a player who loves warm, natural echoes, analog delay is a great choice. However, if you need ultra-long repeats or precise tempo syncing, a digital delay might be a better fit. Many modern delay pedals include both analog and digital modes, allowing for the best of both worlds.

Using Delay in Your Playing: Practical Tips

Delay is more than just an echo effect, it’s a tool for enhancing space, groove, and articulation. Here’s how to make the most of it:

  • Slapback Delay (80-120ms): Perfect for country, rockabilly, and blues. A quick, single repeat thickens up leads and adds punch to rhythm playing.
  • Rhythmic Delay (300-450ms): Used by artists like U2’s The Edge, this syncs with your playing, creating a percussive, bouncing effect.
  • Ambient Delay (500ms+): Longer delays with moderate feedback create dreamy, atmospheric textures. Great for post-rock, shoegaze, or cinematic soundscapes.

Common Delay Mistakes (And How to Fix Them)

Beginners often struggle with delay settings, leading to a few common issues:

  • Too much feedback: Endless repeats can clutter your sound. If your delay starts to spiral out of control, dial back the regen.
  • Overpowering mix levels: If the delayed signal is louder than your original note, it can overwhelm your playing. Keep the mix balanced so the effect supports, rather than dominates, your tone.
  • Delay time mismatches: If your delay is too fast or too slow for the tempo of the song, it can sound out of sync. Experiment with different settings to find what works best for your style.

Start Experimenting with Delay Today

Delay is an essential effect that can transform your sound, whether you’re adding subtle depth or building lush, layered textures. Start with simple settings and gradually experiment with longer repeats and feedback adjustments. Once you understand how delay interacts with your playing, you’ll be able to craft tones that feel both spacious and musical. Now, go plug in, tweak those settings, and explore the endless possibilities delay has to offer.